Hello, friends – I hope you are all doing well. I cannot believe we’re already heading into the second week of December. I spent several hours yesterday getting some holiday cards ready to send out. Is it just me, or does it sometimes take longer to get a card ready for the mail than it takes to actually make it? Did I mention that I only got seven cards out? And so many more to go.
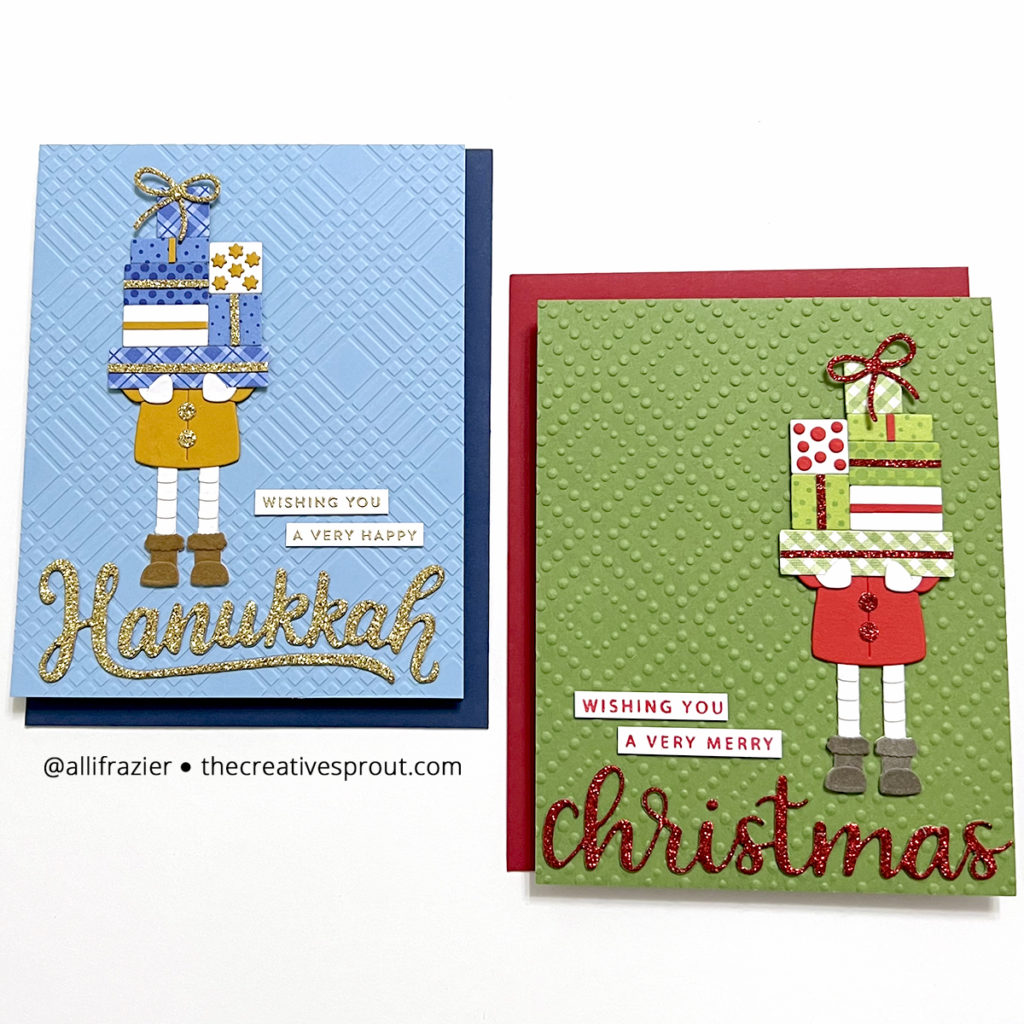
Speaking of holiday cards, I like to make “same, but different” cards for Christmas and Chanukah every year. There aren’t a lot of Chanukah stamps and dies out there, although I do have several great basics. I personally like challenging myself every year to come up with some new card designs. You don’t have to have specific products to make a card – you just have to shop your stash and make slight alterations. With the exception of a few products, my cards today feature products from Spellbinders.
Set 1 Supplies
Spellbinders – Shopping Spree Die Set
Spellbinders – Diamond Plaid Embossing Folder
Spellbinders – Dazzling Dots Embossing Folder
Kat Scrappiness – Happy Hanukkah Die
Trinity Stamps – Scripty Christmas Die Set
Gina K. Designs – Christmas Silhouettes Stamp Set
Simon Says Stamp – Gnome for the Holidays Stamp Set
Simon Says Stamp – Pawsitively Velvet Luxury Cardstock
Thermoweb – Tuscan Gold Deco Foil Flock Transfer Sheets
Concord & 9th – Winter Wonderland Bundle
Making the First Set
This first set of cards features the Shopping Spree Die Set. I usually start with the Chanukah card and then make the matching Christmas card. For the presents, I just shopped my stash of patterned paper scraps. For the square present with stars, I used the die from the Concord & 9th Winter Wonderland Bundle that I think is supposed to be for making tiny snowflakes. But, they look like tiny Stars of David, so they were perfect! You may find that you have dies for snowflakes in your stash that are also similarly shaped.
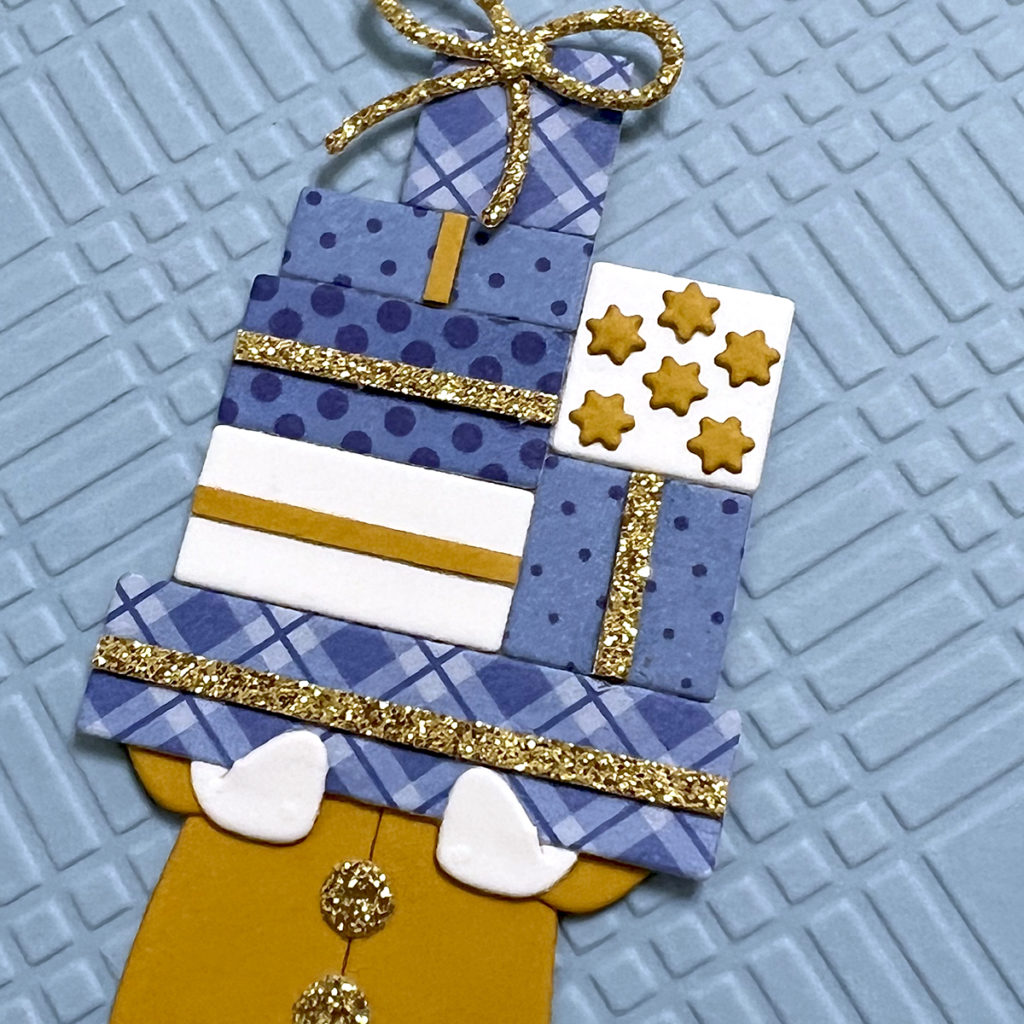
For the matching Christmas present, I just used a couple different dies that cut out tiny dots. We all have a lot of those in our stash! There is a die in the Shopping Spree set that cuts a thin ribbon for the presents. But, I find it easier to just cut thin strips on my paper trimmer and use one long strip to cover all the presents. I used a combination of regular and glitter card stock for my cards.
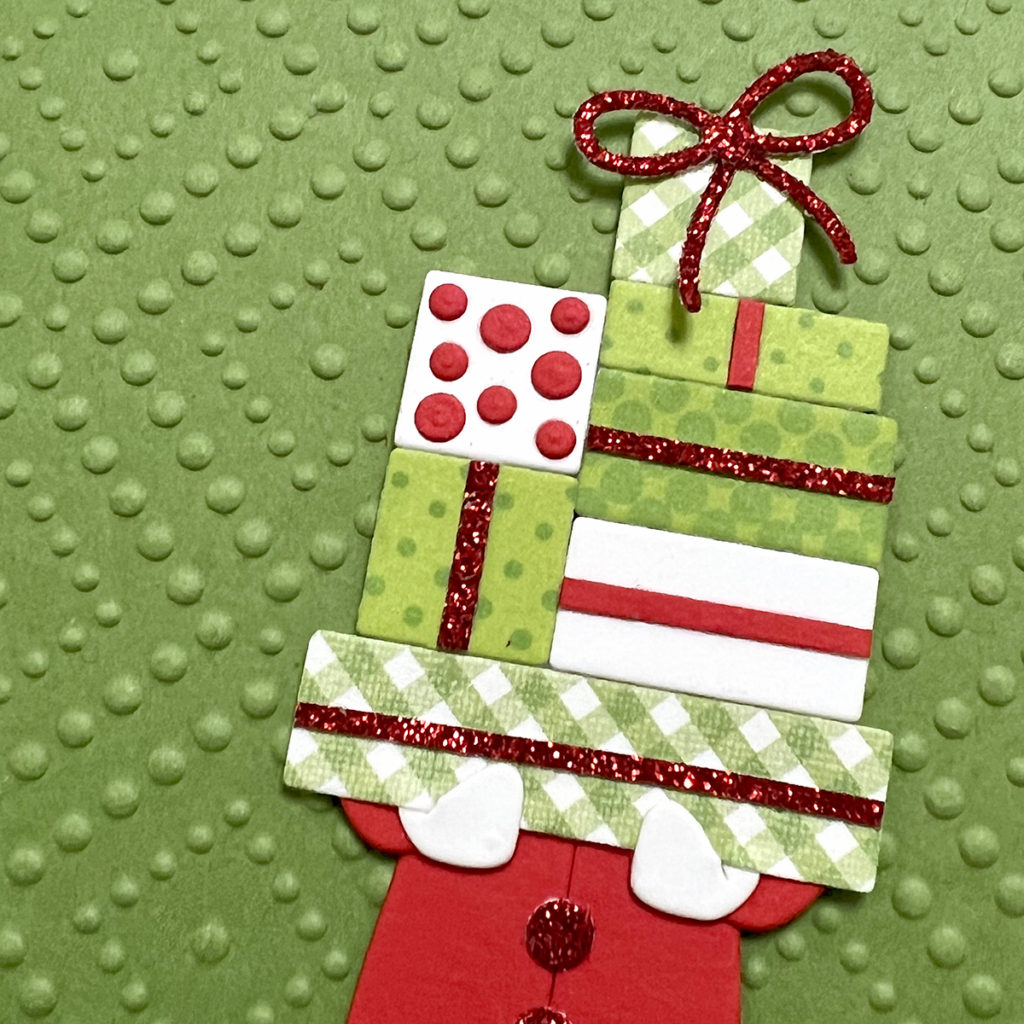
For the backgrounds of my cards, I used embossing folders – the Diamond Plaid for the Chanukah card and the Dazzling Dots for the Christmas card. The “Hanukkah” die is from Kat Scrappiness, and the “Christmas” die is from Trinity Stamps. Both of these die sets also include shadow dies, as well as the words Happy and Merry, respectively. I stamped the secondary sentiments in complementary colors and heat embossed them. I shopped my stash for awhile before I found the perfect matching sentiment stamps! One of my favorite details on these cards are the little boots. I used flock for the boots on the Chanukah card and velvet card stock for the boots on the Christmas card, and they look so real and cute!
Set 2 Supplies
Spellbinders – Parcel & Post Mailbox Die Set
Spellbinders – Loops Embossing Folder
Spellbinders – Ski Lodge Embossing Folder
Spellbinders – Christmas Mailbox Greetings Glimmer Hot Foil Plate
Papertrey Ink – Happy Hanukkah Die
Mama Elephant – The Penguin’s Waddle Die Set
Spellbinders – Christmas Magic Glimmer Hot Foil Plate
Spellbinders – Yana’s Tiny Sentiments hot foil plates
Spellbinders – Hot Foil – Silver
Spellbinders – Hot Foil – Magenta
Spellbinders – Hot Foil – Gold
Spellbinders – Hot Foil – Cobalt Blue
Spellbinders – Glimmer Hot Foil System
Making the Second Set
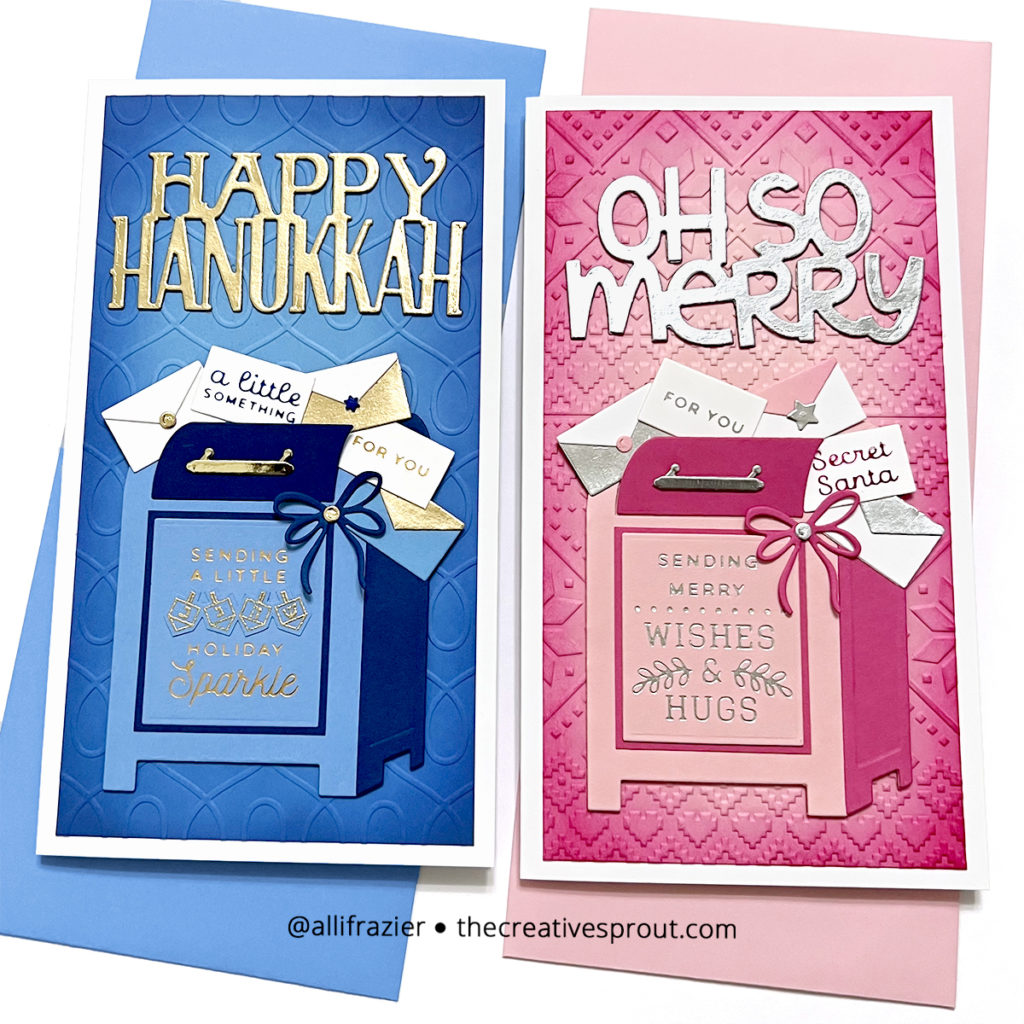
My second set of cards feature the Parcel & Post Mailbox die set. I love this set so much, as it really can be used for any occasion. So, of course I knew that I could make a Chanukah card with it! I wanted to use one of the hot foil plates that was made to go with this mailbox die, so I had to figure out how to alter it. I chose the hot foil plate that says “Sending a little holiday sparkle.” However, this plate has a little strand of Christmas lights in the middle of the sentiment. When I hot foiled it, I just didn’t cover that area with foil. To fill in that area, I used an older stamp set from Cas-ual Fridays called “8 Happy Nights.” I gold heat embossed the little dreidels from that set and fussy cut them out – they are the perfect size to fill in the area where the Christmas lights were. Sadly, this stamp set is no longer available, as Cas-ual Fridays is no longer in business.
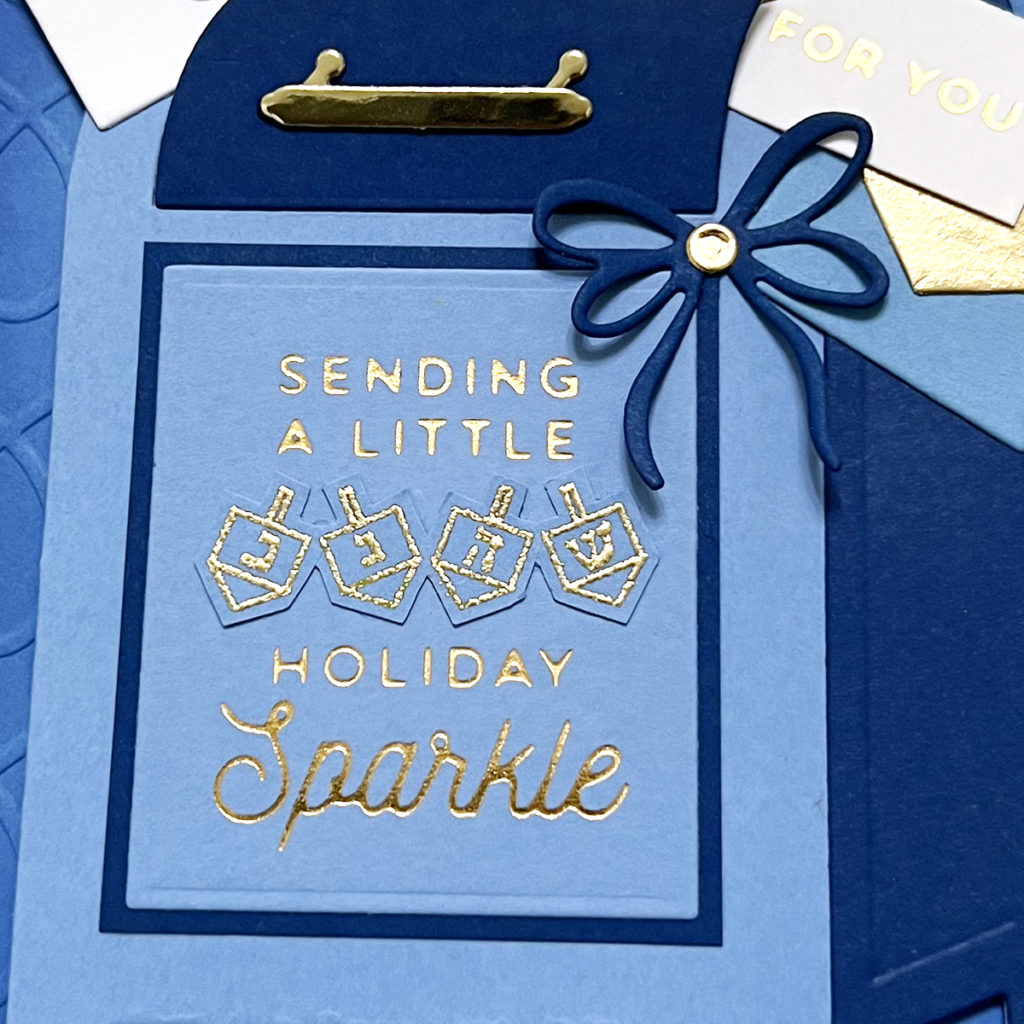
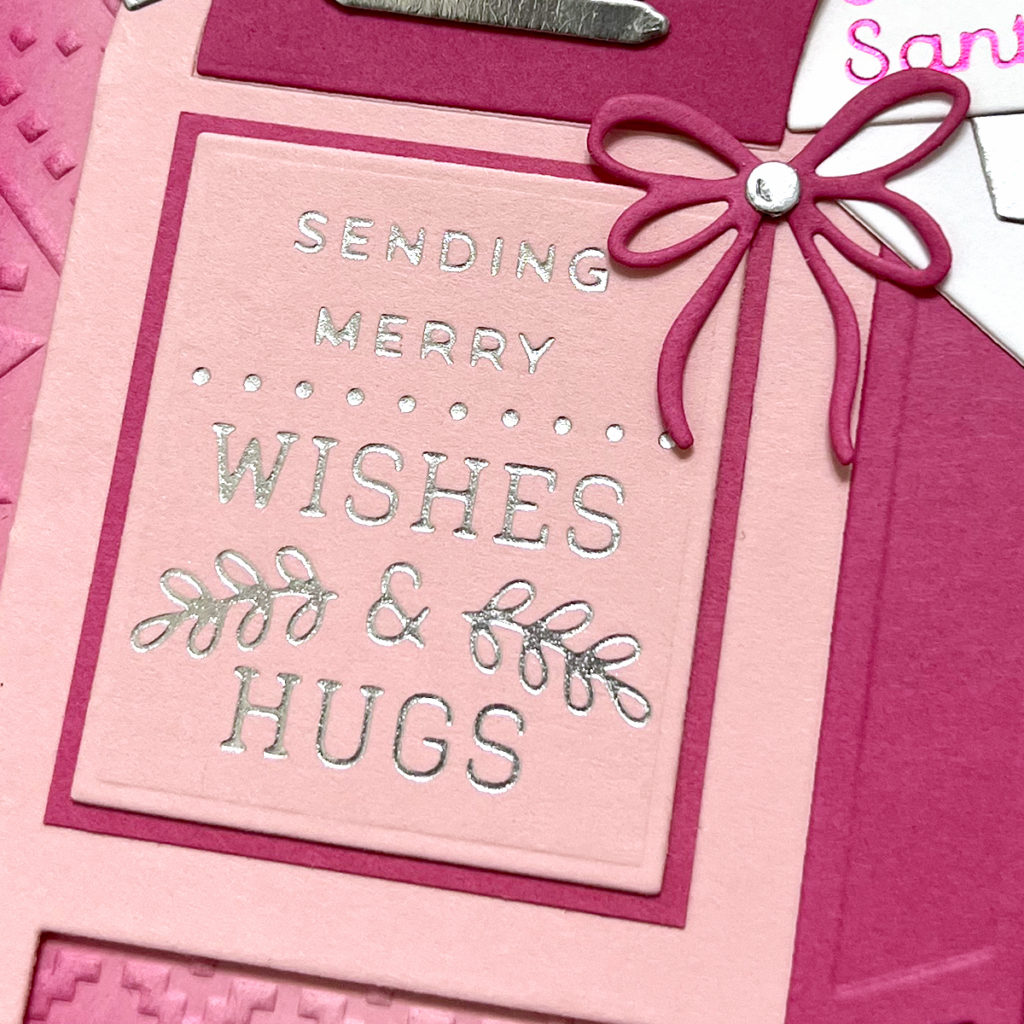
I used a different hot foil plate from the same Spellbinders set for the matching Christmas mailbox, and then I chose some smaller hot foil plates from different sets to make letters for both cards. I just used the little envelope die from the Mailbox set to cut those out. To make the back side of some envelopes, I used some metallic card stocks to mix things up. For the backgrounds, I again used embossing folders – the Loops for the Chanukah card and the Ski Lodge for the Christmas card. I inked up the edges of the embossed panels with a darker color ink. I do wish that I had done that with the first set of cards!
For the main sentiments on my cards, I used the Happy Hanukkah die from Papertrey Ink and the “Oh So Merry” die from Mama Elephant. This word die is actually from a larger set that includes other dies to cut out elements from the Penguin’s Waddle stamp set.
These cards were so much fun to make, and I love how they turned out! I hope they put a smile on your face and inspire you to shop your stash and get creative. Thank you so much for stopping by today.
Wishing you all a crafty day,
Allison
Note: External links on my blog may contain affiliate links. This gives me the opportunity to earn a small commission when you click on the links and place an order. This comes at no additional cost to you. Thank you so much for your support, as this helps me bring you more content.
