UPDATE!
The winner of the January Sneak Peek Kit for my giveaway is:
CATHERINE T MORGAN
January 25, 2023 at 8:16 pm
Congratulations, Catherine!
Hello, crafty friends! Today I am sharing something new and unique. Waffle Flower has developed a new kind of club kit – it’s called the Sneak Peek Club. This club allows members to play with products about a month earlier than they are released to the general public. Among the benefits to being a member is free shipping on all US orders over $29.99 at any time with an active club subscription. Normally, that free shipping threshold is $100. Plus, you can have products shipped with your kit for free. You also have early access to new products 5 days before release day. I encourage you to click here to read all of the terms and conditions of the club. It really is a unique offering!
To celebrate the first club kit – Kit #01 – Waffle Flower is having a Link Party, where guest designers and subscribers will be sharing the projects they have made. There will be giveaways by guest designers, including me!
GIVEAWAY DETAILS:
Waffle Flower sent me the January kit to play with, and it really is adorable. The best part for you, as a follower of my blog, is that you have the chance to win this same January kit! Just leave a comment on this blog post by Monday, January 30th, 11:59 pm MST. The winner will be picked at random and announced in this blog post on Tuesday, January 31st at 10:00 am MST. NOTE: This free kit can only be shipped to a US address.
A few other notes to be aware of. If you sign up for the Sneak Peek Club now, you will not receive this January kit – you will receive the February kit, which will ship on February 6th. Again, you can read how/when the kits ship HERE. All of the products included in the January kit (except for the bonus sentiments*) will be available at the Waffle Flower website for everyone on February 5th.
PROJECTS
Now onto the fun part and the projects that I created with the January kit! The kit includes: Bunny Ears Die, Layered Bows Stencil, one 3.75×5 Oval Shaker Cover, one 2.5×3.75 Oval Shaker Cover, and Bonus Sentiments. Everything comes in a beautiful Waffle Flower zippered pouch. With a few basic exceptions, I designed my projects using only the products in the kit. That way, you’ll see how much fun you can have with it on its own!
Card 1 Supplies
Waffle Flower – Bunny Ears Die Set
Waffle Flower – January Kit Bonus Sentiments* (see below)
Waffle Flower – A2 Layers Die Set
Waffle Flower – JJ’s Rainbows Paper Pad
Waffle Flower – Foam Strips – 1/16″
Spellbinders – Platinum 6
Bearly Art Glue
Making the First Card
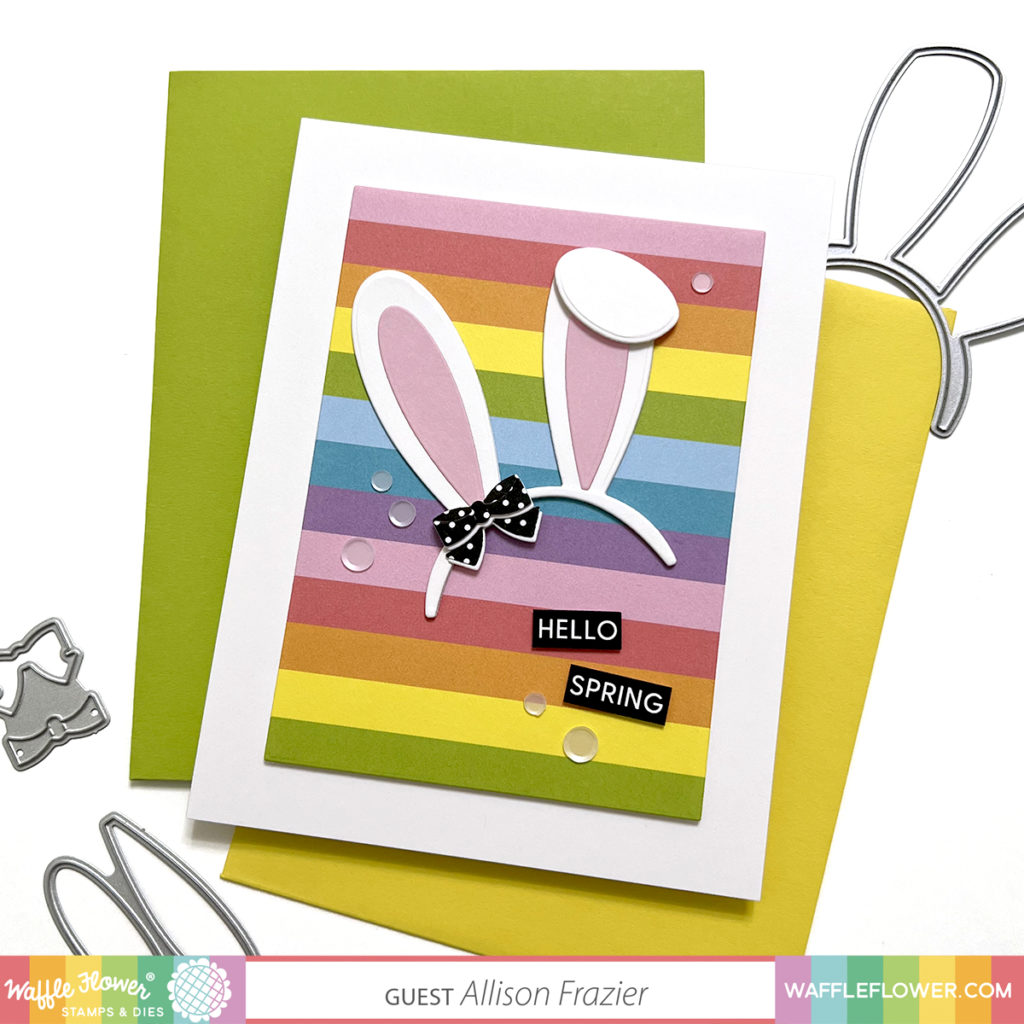
For my first card, I wanted to keep it simple and just highlight the bunny ears. Aren’t they precious? And they’re so quick and easy to put together. The part of the ear that curls over is just too much! A little bit of foam tape behind that part really makes a difference. For my background, I cut a piece of striped paper from JJ’s Rainbows Paper Pad with the A2 Layers Die Set. For my bow, I used some polka dot paper from my stash and layered it on top of a white bow to give dimension and definition.
* For my sentiment, I used the bonus sentiments that were included in the kit. These sentiments will NOT be available for purchase – they are exclusive to the kit. My understanding is that every kit will be different – there may be an exclusive item included, and there may not be. The January bonus sentiments are similar to these – they are printed with black toner, which means that you can foil them with your laminator. They can also be die cut with the Subsentiments Die. As you can see, I left my sentiments black. I finished the card with a scattering of clear confetti.
Card 2 Supplies
Waffle Flower – Bunny Ears Die Set
Waffle Flower – January Kit Bonus Sentiments* (see note for Card 1)
Waffle Flower – Enamel Dots – JJ’s Rainbow
Waffle Flower – Enamel Dots – Clearly Enough
Waffle Flower – Foam Strips – 1/16″
Waffle Flower – Blending Brushes
Waffle Flower – Mini Stencil Mat
Wink of Stella Clear Glitter Brush
Tim Holtz – Distress Ink
Spellbinders – Platinum 6
Bearly Art Glue
Making the Second Card
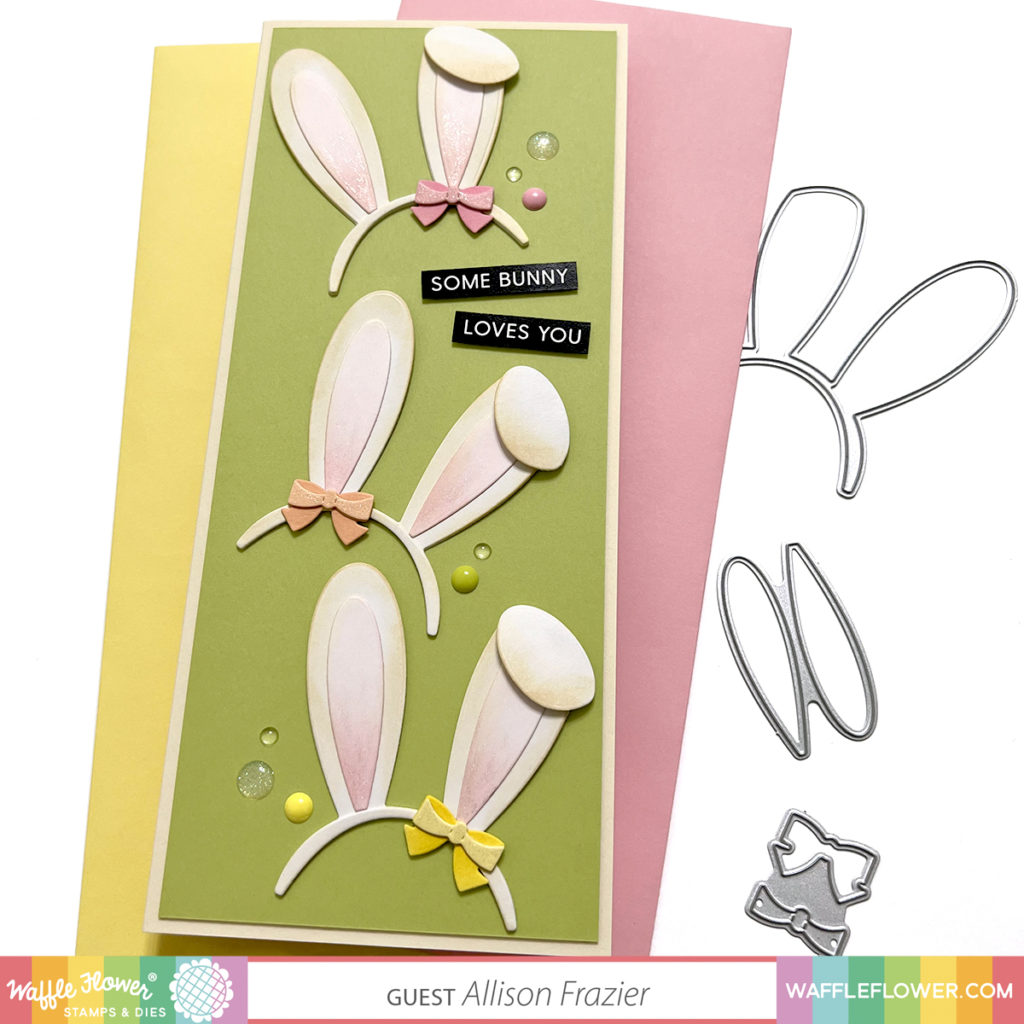
For my second card, I created 3 sets of ears. I cut all of the pieces (except for the bows) from white card stock. I then inked up the sides with Antique Linen Distress Ink. I inked up the ears with Spun Sugar Distress Ink. For the bows, I cut both pieces from one color of card stock and then inked up the bottom layers with the same shade of ink to darken them up. You could cut them from two shades of the same color, but this saves time and paper! I did add two layers of the top piece of the bow to give it more dimension.
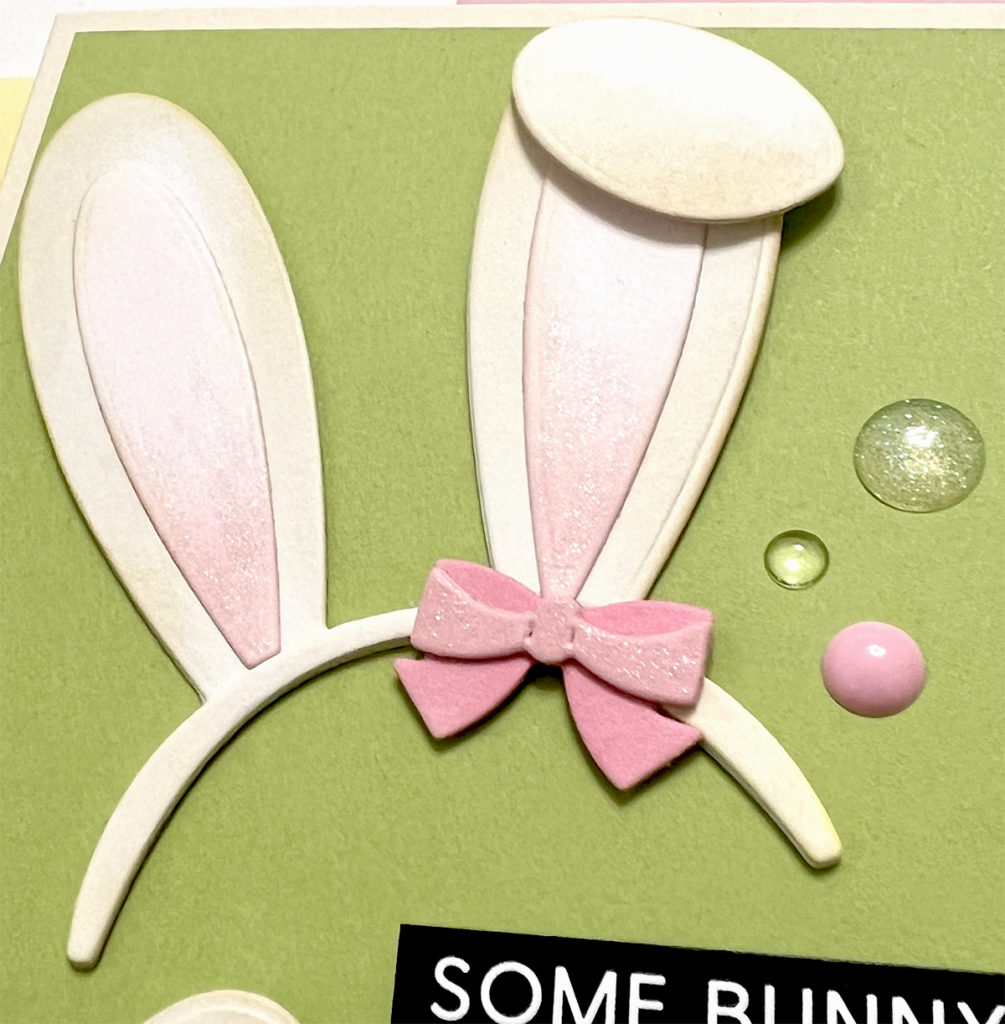
I used the bonus sentiments from the kit, again leaving them black and running a black pen around the edges to cover up the white core of the paper. To finish my card, I added some sparkle to the bows and the ears, and I added some colored and clear enamel dots. Everything was mounted on a slimline card measuring 3.75″ x 8.75″.
Card 3 Supplies
Waffle Flower – Bunny Ears Die Set
Waffle Flower – Layered Bows Stencil Set
Waffle Flower – 2.5″ x 3.75″ Oval Shaker Cover
Waffle Flower – January Kit Bonus Sentiments* (see note for Card 1)
Memory Box – Delicate Pastel Glitter Pad
Waffle Flower – Mini Stencil Mat
Waffle Flower – Blending Brushes
Waffle Flower – Shader Brush 0 – 10/pk
Waffle Flower – Foam Strips – 1/16″
Tim Holtz – Distress Ink
Tim Holtz – Distress Oxide Ink
Tonic Studios – Nuvo Glimmer Paste – Moonstone
Studio Katia – Summer Fusion Sequin Mix
Spellbinders – Platinum 6
Bearly Art Glue
Scor-Tape
Making the Third Card
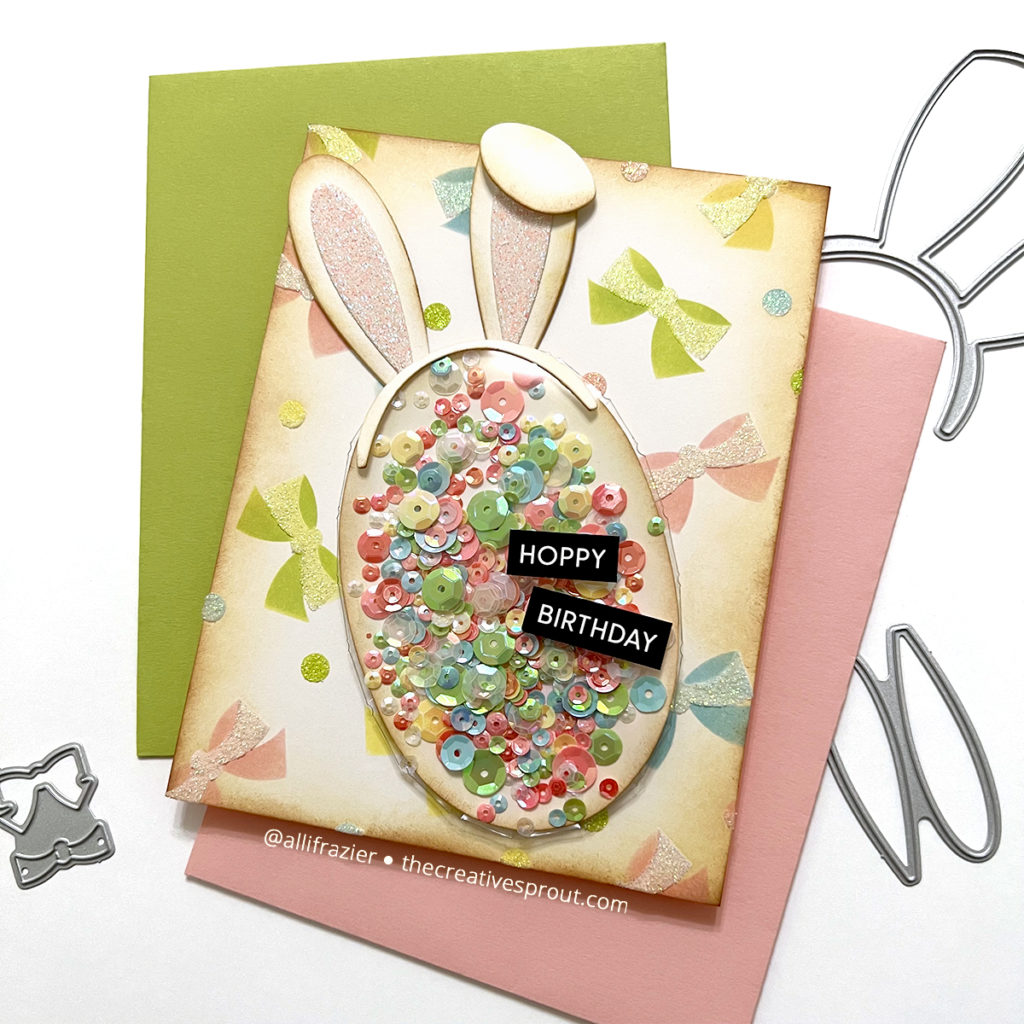
My second project features the adorable Layered Bows Stencil Set, as well as a shaker element made with the new Oval Shaker Cover. I started with the easiest part first, and that was making the bunny ears like I did with the second card. Again, I started with white card stock and inked up the edges with Distress Ink. This time I used Antique Linen and Vintage Photo. I cut the ears from pink glitter card stock.
For the background, I took an A2 sized panel of white card stock and the Layered Bows Stencil set and worked on my Mini Stencil Mat, which is where I like to do all of my stenciling. I also use this mat every time I color die cut pieces, such as the bunny ears. It keeps the pieces in place without having to hold them with your fingers. There are two stencils in this set. One is for the back of the bows, and one is for the top of the bows and the small circles. For the little areas, like the circles, I used my small Shader Brushes. I stenciled both layers with the following colors of Distress Oxide Inks – Twisted Citron, Squeezed Lemonade, Tumbled Glass, and Saltwater Taffy. Once I was finished coloring both stencil layers, I took the stencil layer that has the circles and tops of the bows and spread Nuvo Glimmer Paste through it. This gives really fun texture to the background. Once it was dry, I inked up the edges of the panel with Distress Ink – again, using Antique Linen and Vintage Photo.
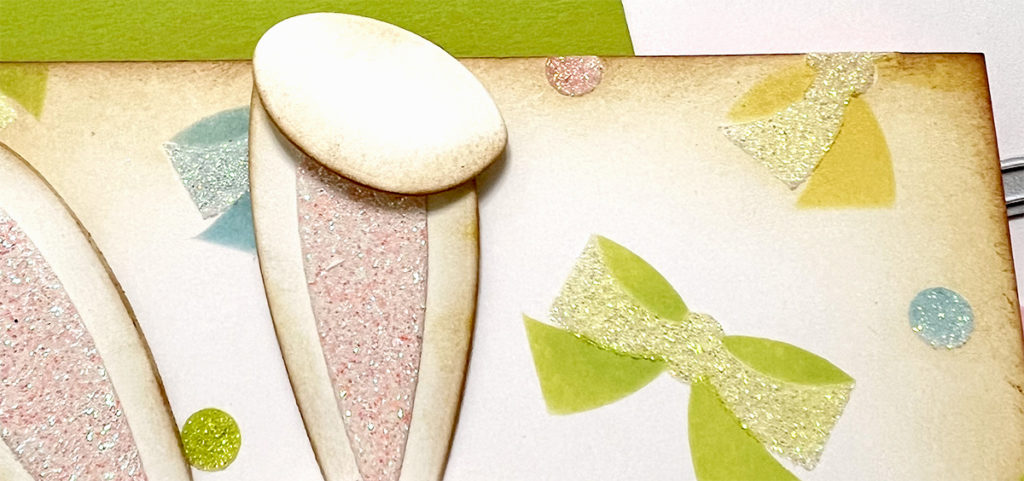
For the shaker element, I used the smaller oval shaker cover that is included in the kit. These are super easy to use – no foam tape needed. All you need is Scor-Tape or some other kind of strong adhesive. The one trick to this particular shaker is that I didn’t have an oval die that I could cut the background with. Waffle Flower does have the Nesting Ovals Die set, and those dies do match up with these new oval shaker covers. Since I don’t have those dies, I found it was really easy to just trace the shape of the shaker cover onto white card stock and fussy cut it out. I also blended the edges of this oval piece to match the rest of the card. Once I had sealed up most of the shaker cover, I poured in my shaker bits and finished sealing it up. I adhered everything to the card base. I put the bunny ears down first, then the shaker, and then I adhered the little piece that finishes the bottom part of the ears on top of the shaker. Finally, I adhered my “bonus” sentiments on top.
Tag Supplies
Waffle Flower – Bunny Ears Die Set
Waffle Flower – January Kit Bonus Sentiments* (see note for Card 1)
Waffle Flower – Lacy Circles Die Set
Therm O Web – Sunshine Yellow Flock Transfer Sheets
Spellbinders – Platinum 6
Bearly Art Glue
Making the Tag
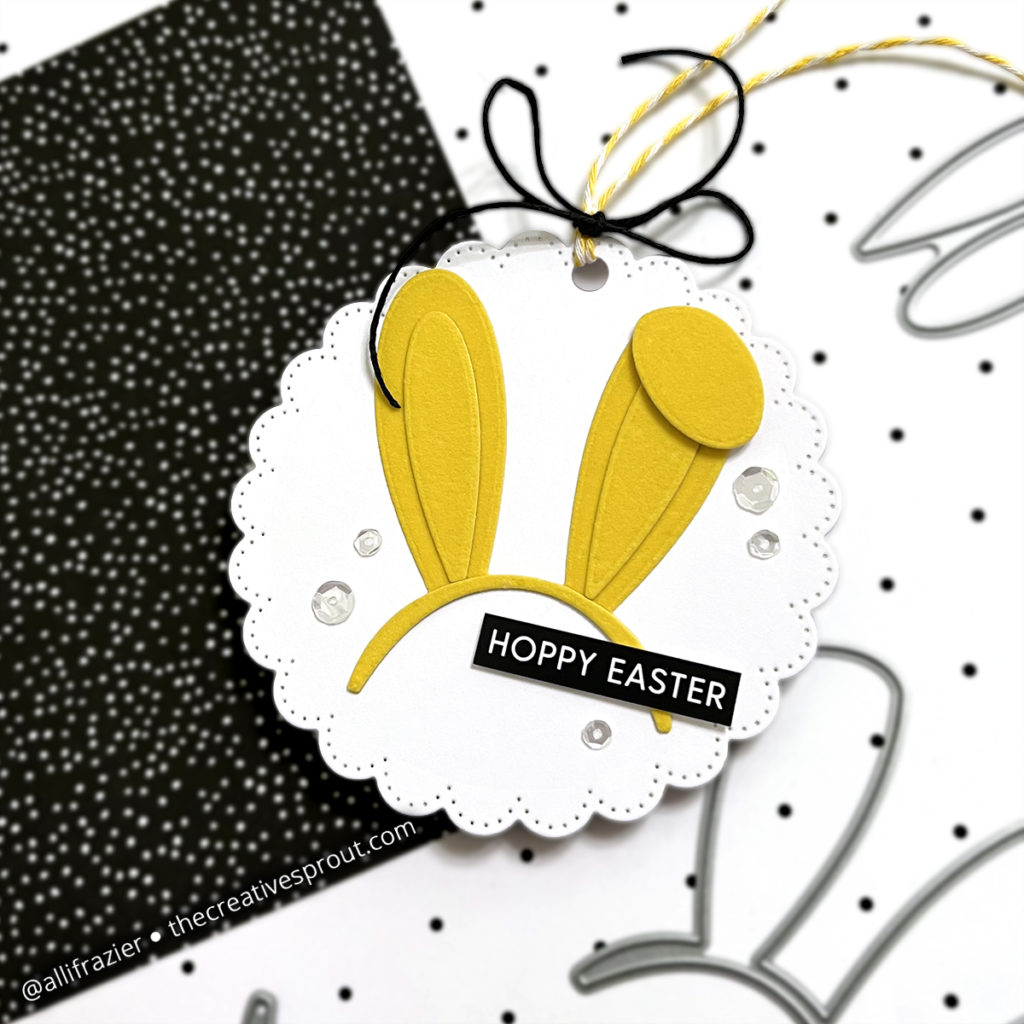
I wanted to make a tag and thought about cutting the ears from white felt. But then I ran across this yellow flock in my stash. If you’ve never used flock, it is similar to the kind of foil that you use in a laminator. Anything that you can foil in your laminator, you can also flock. You can also just die cut the flock. Flock has a fuzzy texture to it, and as soon as I cut the ears, I was getting serious Peeps vibes. Raise your hand if you like Peeps! I myself have never had them. I stick to Reese’s eggs. And trees. And hearts. Oh, and pumpkins! And now they make Reese’s footballs – have you seen those? I digress…
I wanted my yellow bunny/peep to stand on its own, so my tag is very simple. I cut a lacy circle from white card stock, punched a hole in the top, and glued my bunny ears down. I again used a sentiment from the January kit and finished with a bit of string and a scattering of clear sequins. Simple, but oh so cute!
That’s it for my projects today. I had a lot of fun playing with this kit, and I hope my cards put a smile on your face.
Wishing you all a crafty day,
Allison
Note: External links on my blog may contain affiliate links. This gives me the opportunity to earn a small commission when you click on the links and place an order. This comes at no additional cost to you. Thank you so much for your support, as this helps me bring you more content.

Such bright and cheerful cards and tag. Love them all and love the versatility of these adorable bunny ears!
Hopping along to see all the different ideas.
I am really excited about the kit! go go waffle flower
SQUEAL!! These are just the SWEETEST Cards and I ADORE those Bunny Ears!! THANKS for sharing and have a FABULOUS Week!!
Wow that rainbow card is so adorable! What a great idea to have a club like this.
Your cards with this new kit are so adorable! Thanks for sharing. This is such a neat new concept in kits and I really like how it comes packaged.
The tags are a great idea..love the Sneak Peek kits..I can always pick up more items if I choose..cool concept!
Such cute ideas for this sneak peek kit. Thank you for sharing!
I love them all. I really want this kit since I was born on Easter and because mainly it’s so cute.
Adorable cards and tag! I love the instructions.
Soooo many great ideas with those cute bunny ears! I LOVE the rainbow background one!
Such a great array of inspiration, Allison. Your slimline card steals the show for me and I am loving the bow stencil too.
I just LOVE the bunny ears. It reminds me of a little girl in my 2nd grade grandson’s class. She wears bunny ears to school, and in her school picture. This design is adorable
This kit is adorable and your cards turned out great
Congratulations, Catherine! You are the randomly selected winner of the giveaway! Please send me an email at allison@thecreativesprout.com with your email and mailing address. I will pass it along to Waffle Flower, and they will send you the January Sneak Peek Kit!
I love the cards, but I’m especially partial to the tag. It’s so cute!
Love these bunny ears and the sweet bow! Such fun cards and tag with this kit!
Cute cards using these adorable ears! Looks like a “must-have”!
So adorable, love the slimline with three adorable bunny Ears!❤️
This kit is so much fun!! Love those bunny ears and the oval shakers are so cool. Your slimline card is just my style. I would love to spend time with my granddaughters making some of these ears for Easter. Great job and TFS
Absolutely adorable cards. Love the Bunny ears!
This is so stinking cute. I am not sure which one I love more but I have been doing shaker cards for the grandkids so there is that but they are all darling.
fun kit – love how you used these products
Oh, goodness, Allison! These are all just fantastic!! So cute! Love stripes, the shaker and the slimline. Well done!! TFS –
Lori S in PA
Those are the cutest bunny ears! I love the one floppy ear. The shaker card is darling as well.
the bunny ears headband is just so cute!
I’m really ready for spring!!!