Hello, crafty friends. I hope you all had a wonderful weekend. If you have a 3-day weekend, I hope you’re savoring it! It seems like I’m always starting out my posts talking about the weather. So, for a change of pace, I wanted to welcome any of you who are new to my blog. I really appreciate you all, both old and new subscribers! And for those of you who are not new, do you notice anything different? I did a refresh to my website, and while there’s definitely a lot more work to do, I think I like it, especially the Home page. Let me know what you think. I’d love to hear your comments, especially if there’s anything you especially like or dislike about the new look. To me, it’s more clean and fresh – it’s like I did some spring cleaning!
Aaaand, back to the weather – ha ha. The cold just isn’t doing it for me this year. Many of you may know that I broke my ankle in November, and it’s been a slow recovery. I rarely left the house at all for several months, and then every time I felt like I’d be up for taking a walk outside, it would snow! Good news is that things are improving…my ankle, not the weather. Regardless of what it was like outside, it was springtime in my craft room this weekend! I received some goodies from Waffle Flower that I couldn’t wait to play with, and I pulled out a bunch of older Waffle Flower products, too. So, without further ado…
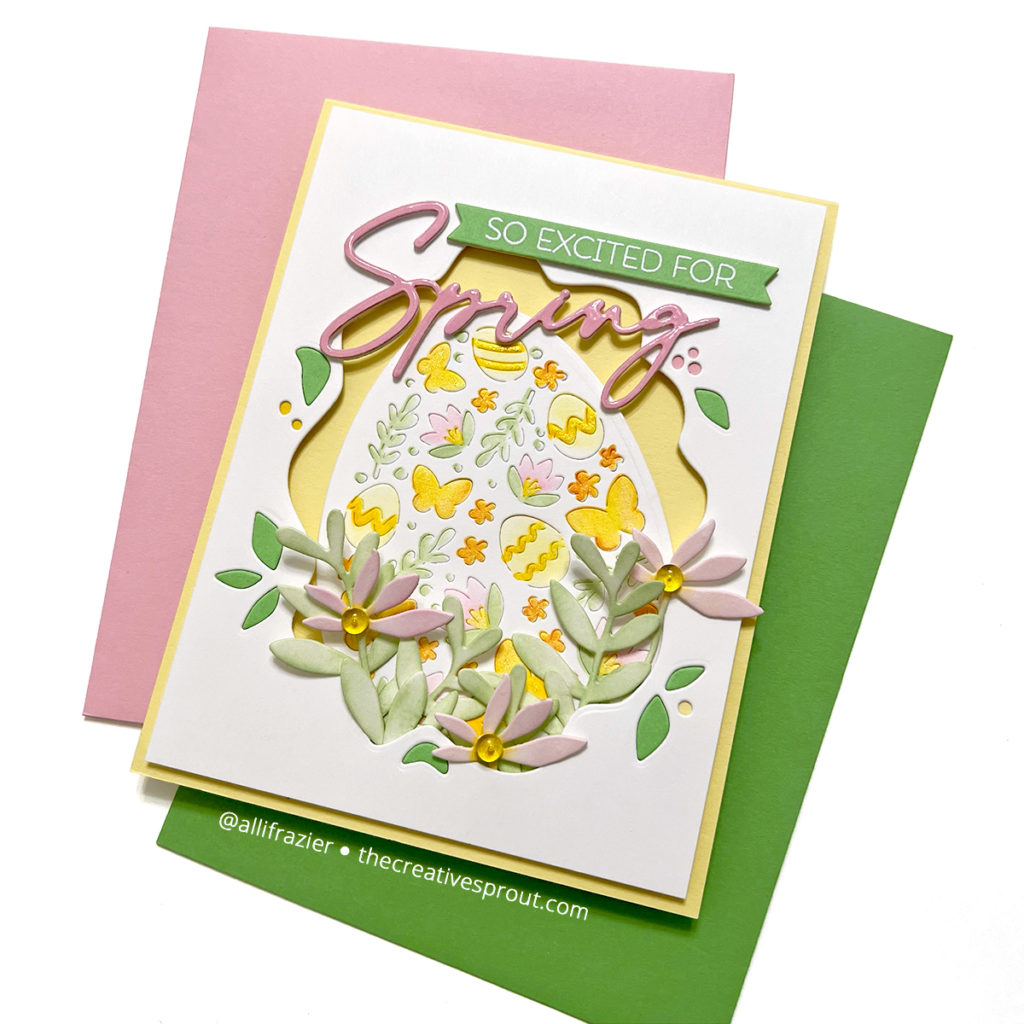
Making the First Card
Note: all supplies are linked to multiple sources in the thumbnails at the bottom of this post.
For all three cards today, I used the new Spring Egg Die and matching Spring Egg Coloring Stencils. The combination is really cool because the die doesn’t cut all the way through – it just etches the pattern into the egg. It’s really easy to line up the stencils with the design, which you can still see after you’re done stenciling. There are four stencils – actually, two stencils that each have two patterns on them. I usually make things more complicated when it comes to layering stencils, but I decided to just go with the flow this time. I used one color per stencil. You can really have fun with these stencils, though, and use a lot more colors. I used PinkFresh Studio inks to color all my eggs today. For this first egg, I used Lemon Whip, Marigold, Clementine, Ballet Slipper, and Fresh Pear.
For the white frame, I used the new Organic Frame Die. The foliage at the bottom is from the Sprigs Die Set, an older set that I love. I adhered the frame to a yellow A2 card base, popping it up on foam tape so that I could tuck the foliage in.
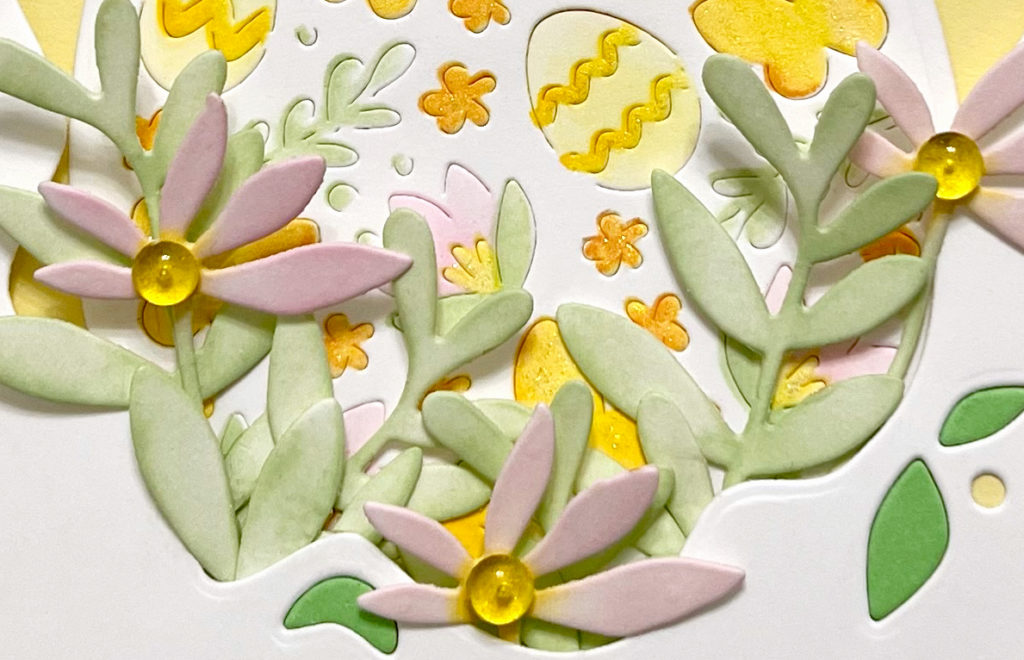
I added my sentiments to the top of the card. The Spring word die is from The Greetery. Do you ever spend a ridiculous amount of time figuring out exactly where you want something to go on a card, only to then glue it in the wrong place? Yep, I did that with this Spring word. I glued it quite a bit lower than I meant to – OOPS! As for the subsentiment, I was going through my stash looking at all sorts of possibilities when I ran across this one, which is from the retired “Adventure” stamp set from Honey Bee. FYI – if you ever see something you like that is retired, try searching around for online resellers – they may still have some in stock. I have linked one below who has this set. I added some Glossy Accents to the Spring die cut. I finished the card with some yellow dew drops on the die cut flowers and some Midas Touch Aqua Shimmer Pen on parts of the egg.
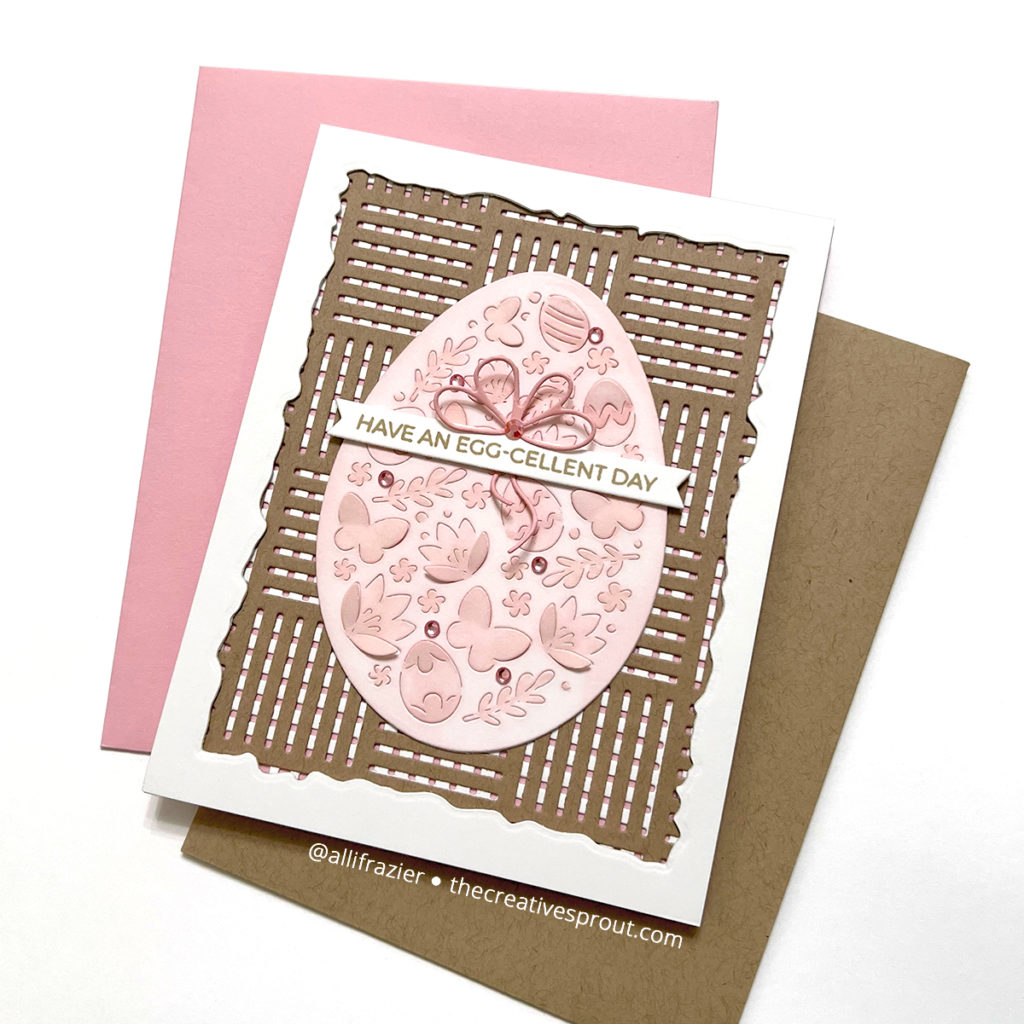
Making the Second Card
My next card features the new Woven Pattern Die. I cut it once from Kraft card stock and once from white card stock. I flipped the Kraft piece upside down and adhered it to the white piece – this creates a new pattern and lots of texture. I then glued these to a pink A2 card base. I added a white frame that I made with the Deckled Frames Die Set. I use this set a lot – it’s one of my favorites.
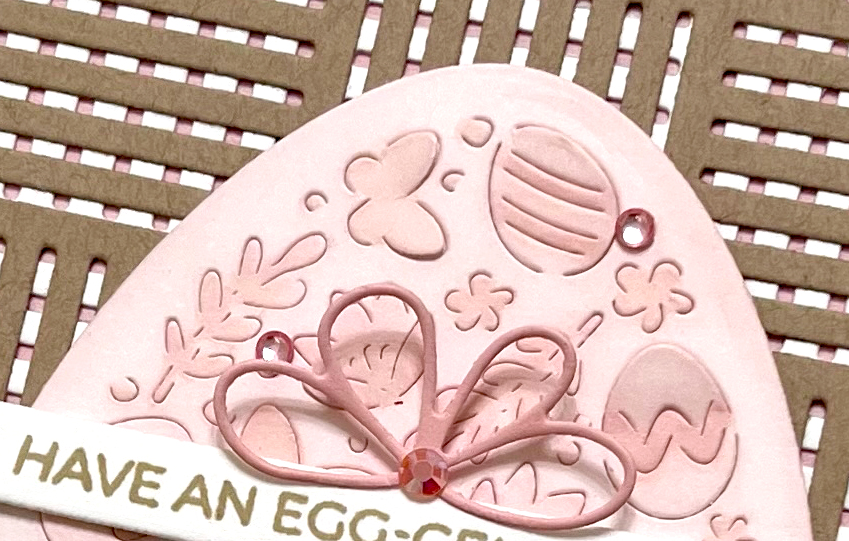
I die cut the egg from white card stock and lightly ink blended it with Ballet Slipper ink. I used that same ink for all of my stenciling, too, blending with a heavier hand in some places. I love the monochromatic look. I should have mentioned this before, but there are two dies in the Spring Egg Die set – one that cuts out the shape of the egg and one that cuts/etches the design.
For the sentiment on my second and third cards, I used another retired stamp set (sorry!) – this time, by Trinity Stamps. This is one of my favorite set of springtime sentiments, which is fitting because the name of the set actually is “Springtime Sentiments”. Again, I have linked to a reseller below who appears to have 1 or 2 of these left. Obviously, there are options that you probably have in your own stash for sentiments, whether they’re Easter or general spring themed. So many things would work here. I happen to love the punny sentiments in this Trinity Stamps set. I added my sentiment, along with a “faux bow,” which I cut from the Twine and Bows die set. I finished the card with some pink jewels.
Making the Third Card
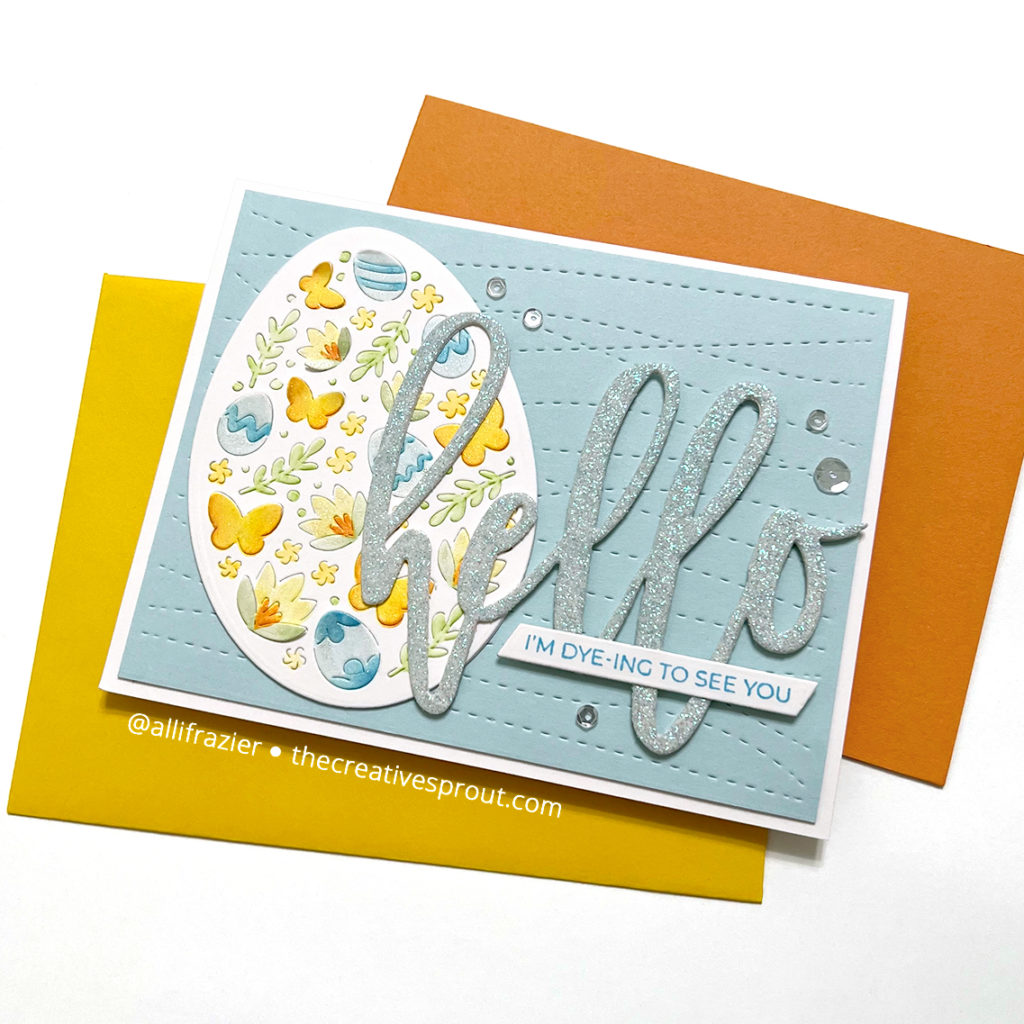
My last card again features the Spring Egg, along with the Oversized Hello die. For this egg, I used the following PinkFresh Studio inks: Lemon Whip, Marigold, Clementine, Sky Blue, Summer Shower, and Fresh Pear. I die cut a panel of light blue card stock using the Wave Texture Die – another one of my favorites. I love dies that just give texture to the background without actually cutting. I used the Oversized Hello to cut some light blue glitter card stock. The subsentiment is another punny one from the Trinity Stamps Springtime Sentiments. I finished the card by sprinkling a few clear sequins around the panel and adding some Wink of Stella to parts of the egg design.
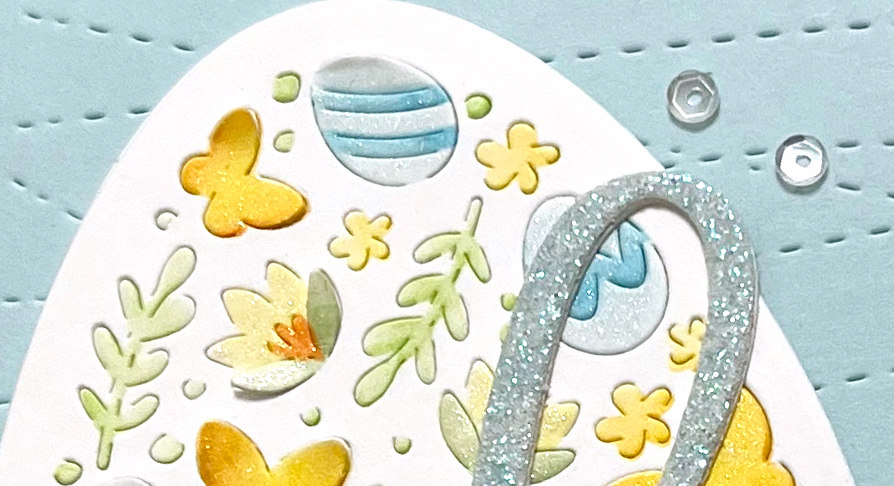
In the picture above, you can see the detail that you get from the Spring Egg die. While it doesn’t cut the pattern all the way through, it does allow you to pop up some of the elements, like the butterfly wings and the leaves on the flowers. I love this added texture and dimension!
I had a lot of fun making these cards and pretending it was springtime. These colors just make me happy! I hope they put a smile on your face today. Leave me a comment and let me know which card is your favorite! All of the products that I used are linked below.
Wishing you all a crafty day,
Allison
SUPPLIES
Note: External links on my blog may contain affiliate links. This gives me the opportunity to earn a small commission when you click on the links and place an order. This comes at no additional cost to you. Thank you so much for your support! You can see more information on my Affiliate Disclosure page.


These are all super-pretty!! Great work!
Lori S in PA
Thank you so much, Lori! I appreciate all of your comments so much.