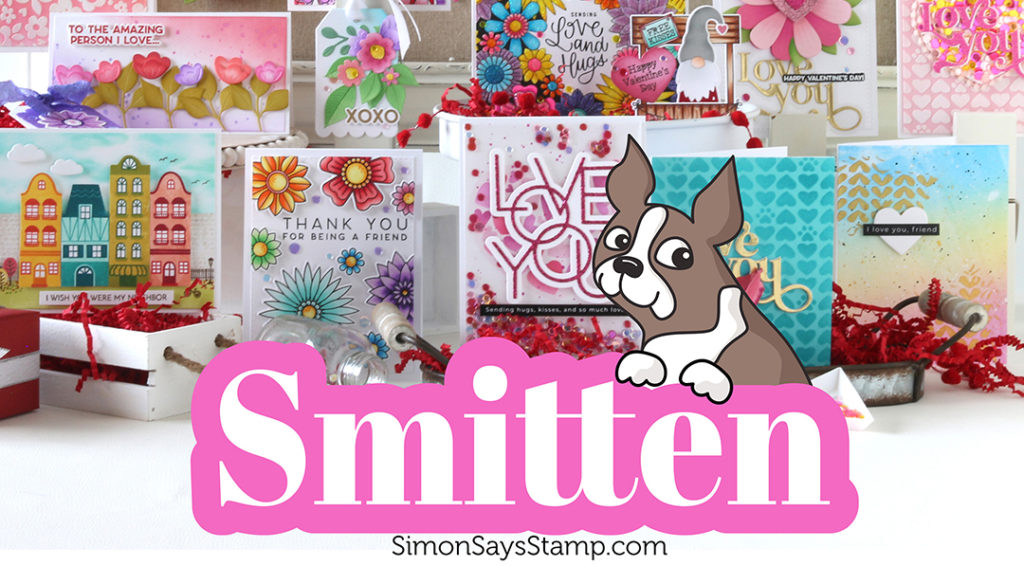
Hello again, friends! I am excited to be able to share the brand new Smitten Release from Simon Says Stamp! As is obvious from the name, this release is full of love. From dies to stamps to hot foil plates and more, this release has you covered for all those love-ly occasions, such as Valentine’s Day, anniversaries, birthdays, etc. As always, though, you’re never limited to one type of occasion with products. Use your products for what YOU want! You’ll see from my cards today that I only have one “typical” love card. And speaking of products that aren’t focused on love, I also have a brand new embossing folder to share, which is actually included in the brand new January 2024 Card Kit from Simon.

NOTE: All Supplies are linked to multiple sources in the thumbnails at the end of this blog post.
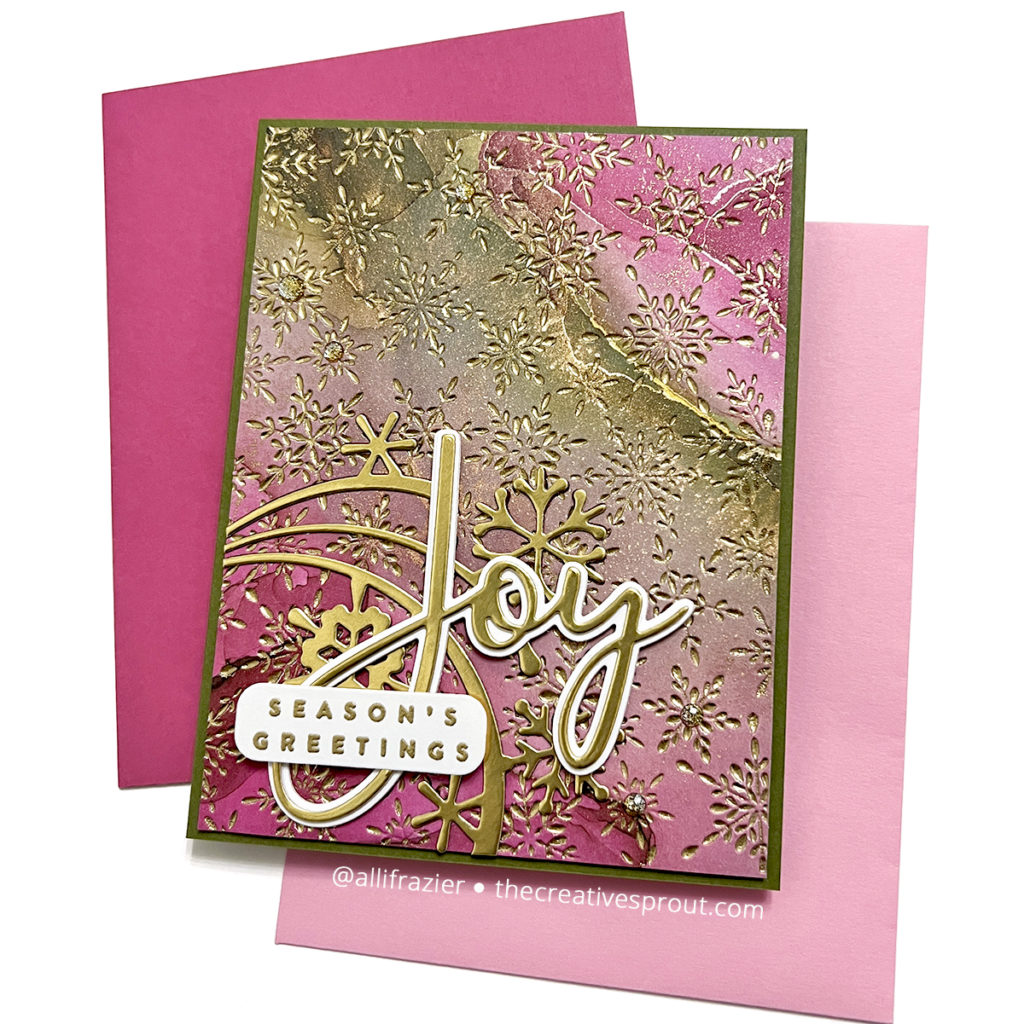
Let’s start off with this new Cheery Snowflakes Embossing Folder. As mentioned above, this folder is included in the new card kit. But, you can also buy it separately. It is a great folder for techniques since it is an all-over pattern. For my card, I actually embossed a piece of patterned paper! I chose a sheet from the “Ink Drops – Vivid” Paper Pad from Craft Consortium, which is an absolutely gorgeous pad of papers. Before putting my paper in the embossing folder, I inked up the raised edges of the folder with VersaMark ink. When I took my paper out, I immediately sprinkled gold embossing powder over it and heat embossed it. If you are going to try this technique, be sure to wipe your paper with an anti-static powder tool before putting it in the folder. This will help ensure that powder doesn’t stick where you don’t want it.
After heat embossing, I was left with the most gorgeous panel! The gold embossing powder is debossed into the snowflake pattern. For my card design, I pulled the Snowflake Curl die out of my stash and cut it from matte gold card stock. I also used the same gold cardstock to cut the Large Joy word die. My subsentiment comes from the Simple Holiday Greetings stamp set. To finish the card, I added some gold Ombre Glitter Drops from Pinkfresh studio. I love how this card turned out and will definitely be using patterned paper in my embossing folders more in the future!

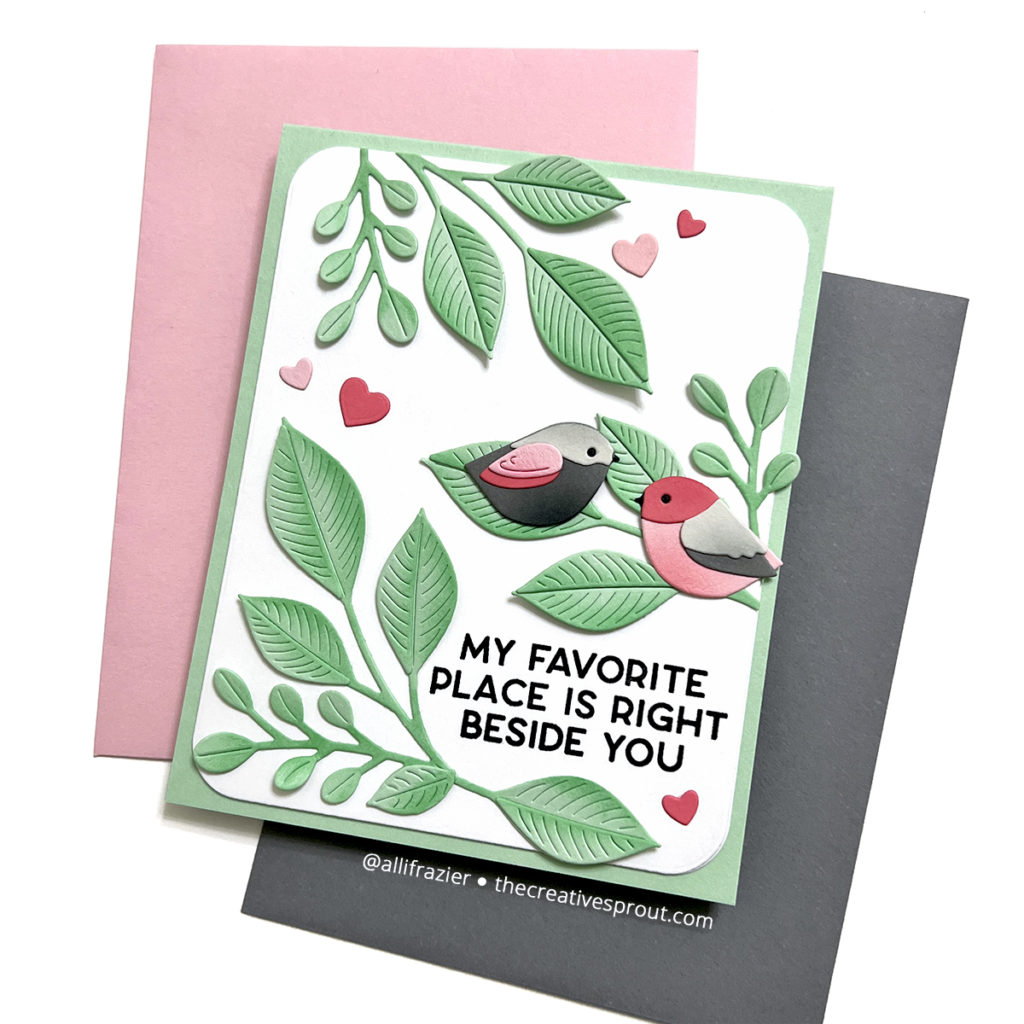
Let’s embrace the Smitten theme and move to this sweet card! This card features the new Grand Corner Leaves Die. This is one of those products that can definitely be used for any and all occasions. I used some green ink to add shading to my die cut leaves, which I had cut from mint green card stock. I then arranged the leaves around my card panel, which I had cut from the Rounded Corner Rectangles Die Set. Before adhering the leaves to the panel, I stamped my sentiment with black pigment ink. This sentiment comes from the new “My Love Greetings” stamp set. The focal point of the card is probably the two little love birds, which are from the Layered Bird Bunch Die Set. I cut the pieces from colored card stock and then used some Distress Ink to add a little bit of shading. Aren’t they so sweet? To finish off the card, I added some small heart die cuts, which came from my stash. I keep a little container of little leftover die cuts like this on my desk, which really comes in handy!

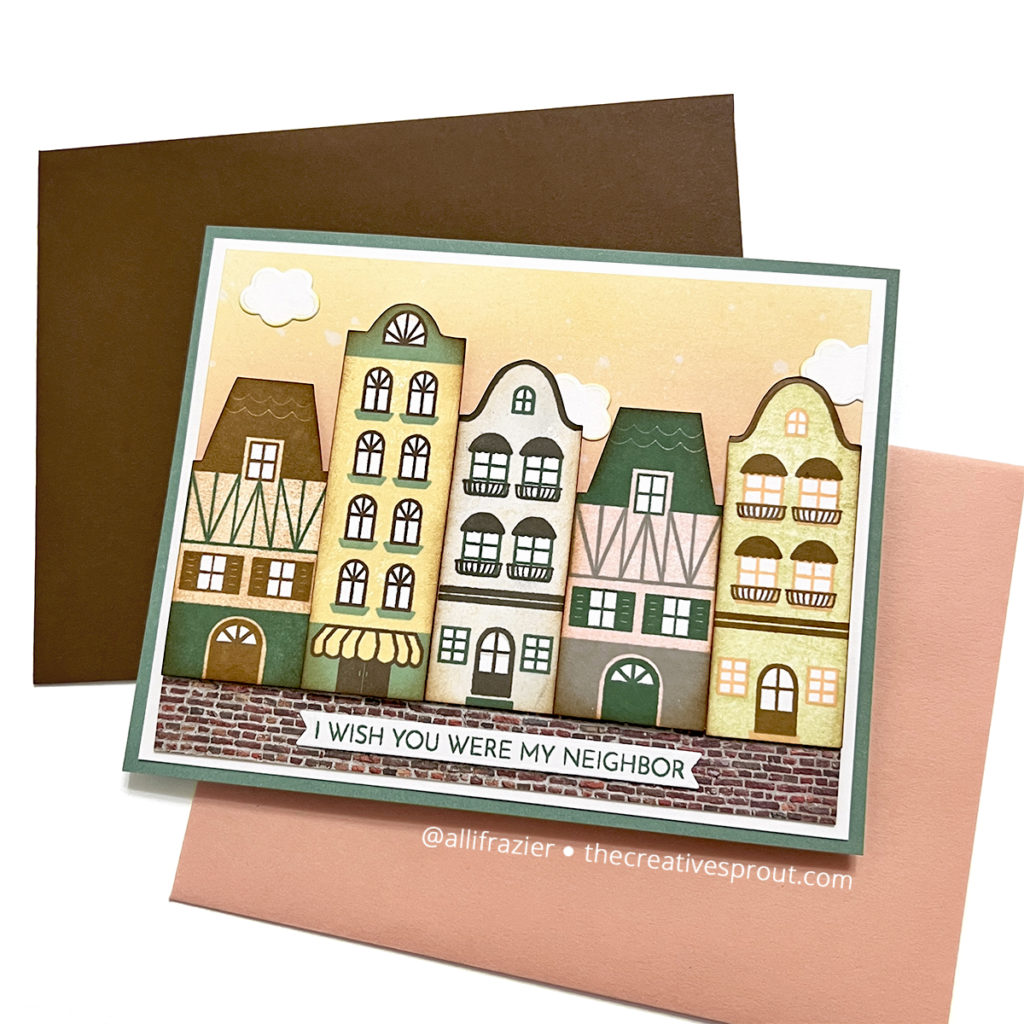
My third and final card for today is really unique! This features the new European Street Buildings Stamp Set. This is a layering stamp set, and it is so easy to stamp. What’s really cool about this set is that it has several add-ons, as well as some matching dies. There is even a bundle set, which includes everything. I made this card with JUST the main stamp set. I used very muted colors and was purposefully going for an old European village vibe. I don’t normally stamp with Distress Inks, but in this case, the uneven and imperfect stamping that you get with those inks really lent to that old world look! After fussy cutting the buildings, I added some Vintage Photo to the sides of all the buildings to add an even more aged look to them.
My cobblestone street comes from patterned paper. Again, I reached for a pad from Craft Consortium. This time, it was the Brick Textures Pad. I ink blended a sky onto white card stock using Scattered Straw and Victorian Velvet Distress Oxide. I added a few little clouds, which I again pulled from my stash. I believe these little clouds come from a baby-themed die set. You never know where you will find the perfect pieces to finish your cards! Once the sky was finished, I added my buildings (which I had fussy cut) with foam tape. I stamped the sentiment with dark green ink and added that to the bottom of the card. I love the look of this card – it is so different from what I normally do!
I hope these cards put a smile on your face! Be sure to check out all of the other products that are in the Smitten release. Thanks for visiting my blog today.
Wishing you all a crafty day,
Allison
SUPPLY LIST
Note: External links on my blog may contain affiliate links. This gives me the opportunity to earn a small commission when you click on the links and place an order. This comes at no additional cost to you. Thank you so much for your support! You can see more information on my Affiliate Disclosure page.

