Hello, crafty friends! I am very excited to be joining Alex Syberia Designs for the new “Grateful For You” Release Blog Hop!
Giveaway
Alex Syberia Designs is giving away a $50 gift certificate to ONE winner and a $15 gift card to THREE lucky winners. Be sure to leave a comment for your chance to win!
Open internationally. All four winners will be drawn from the entrants that have played along with this Blog Hop by midnight BST October 31st, 2024. Winners will be announced on the Alex Syberia Designs blog ‘Giveaway Winners‘ page on November 1st, 2024. You can find the full hop list at the end of this post.
I have a lot of inspiration to share from this release, but for today’s cards, I am featuring the new Whimsy Blooms Bouquet die set.
Note: all supplies are linked in the thumbnails at the end of this blog post.
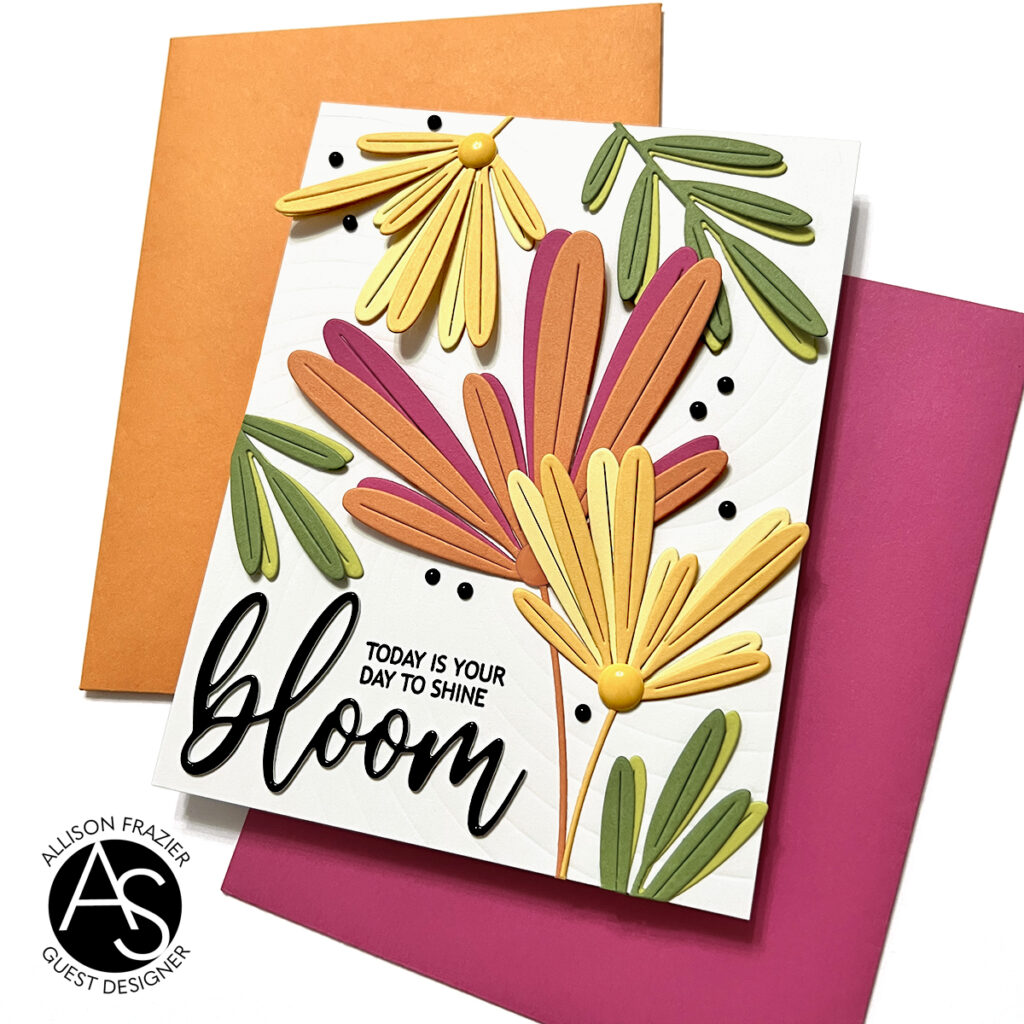
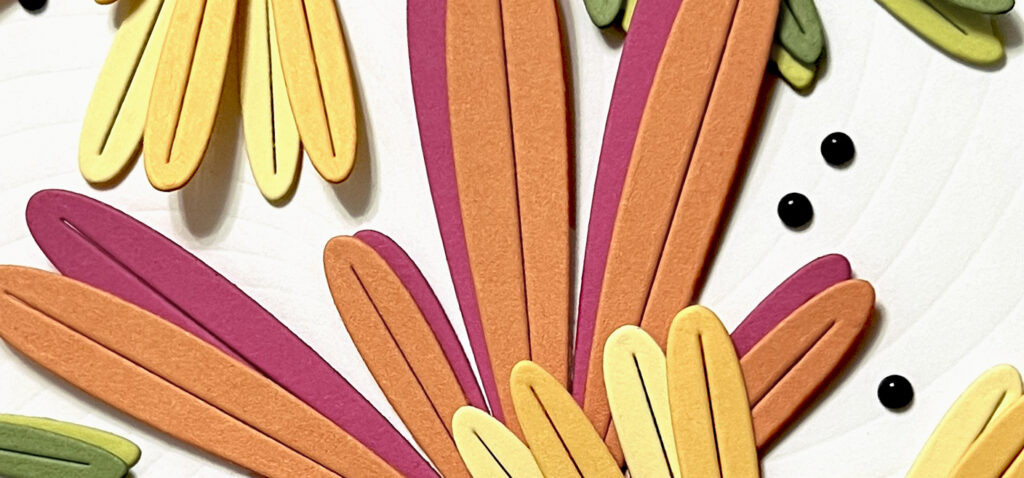
For my first card, I used the long leaves and “leafy” looking flowers from the Whimsy Blooms Bouquet set. I die cut each element out from a main color of card stock. I then cut a second element out from a slightly different color. I glued these together, slightly offsetting them so that you can see both colors. For the flowers, I did cut the stem off of that second color that is in the back, so that it just looks like a natural part of the flowers.
It may be hard to see in the main picture, but I did emboss the white card panel using a dry embossing technique and the Sunrays Hot Foil Plate. There are instructions with most die cutting machines on how to emboss with a die. Embossing with a hot foil plate is the same thing as embossing with a die. However, I only wanted very subtle texture in my background. So, I played around with my die cutting “sandwich”, eliminating the thicker adapter plate from my Platinum 6 instructions and adding card stock shims until I had just the lightest amount of pressure when running the hot foil plate and my paper through the machine. See the pictures below, and you may see that very subtle sunray pattern!
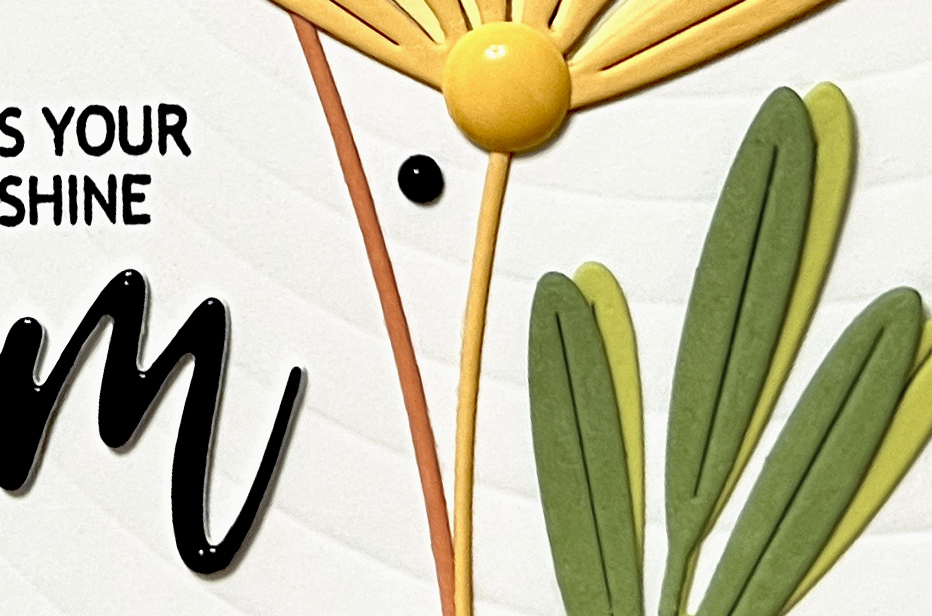
My main sentiment is the new Bloom Die, which I cut from black glossy card stock. I think this scripty font is so beautiful! Before glueing this and my other elements to the card base, I first lined everything up so that I could figure out where to stamp my subsentiment. The fact that I was stamping on this panel is partially why I wanted that sunray embossing to be so subtle. I stamped the sentiment, which comes from the Sunkissed Memories stamp set, with black pigment ink. Then, I proceeded to glue my elements on. I snipped off any excess die cuts that hung over the edge of the card base. To finish, I added a few black enamel dots around the design, as well as some large yellow enamel dots to the yellow flowers.
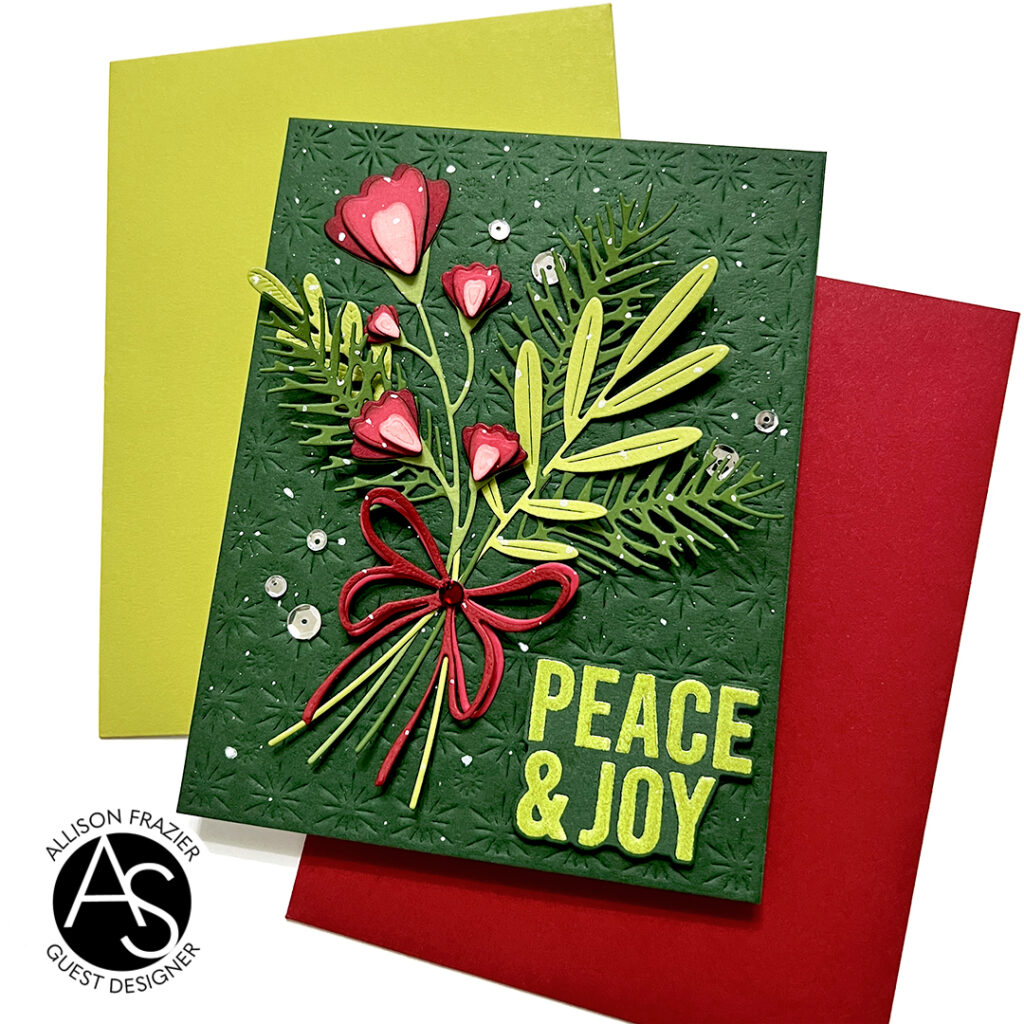
For my second card, I paired elements from the Whimsy Blooms Bouquet with some elements from the Jingle Bell Joy die set to create this beautiful Christmas card. I started off by embossing an A2 sized panel of green card stock with the Sparkly Flakes Cover Die. Dry embossing with this die looks very similar to actually die cutting with it, but I just love the look of it when it’s embossed. Unlike the first card, I actually did follow the normal instructions for embossing with a die.
I die cut all of my elements, including the flowers, bow, and leaf from the Whimsey Blooms set, and the pine leaves and smaller leaf from the Jingle Bell Joy set. For the flowers, I used two shades of red card stock and one shade of pink card stock. I used a darker color ink to ink up the edges of each layer of the flowers, which adds a look of dimension. I also used thin foam squares to layer the larger flowers, which adds actual dimension!
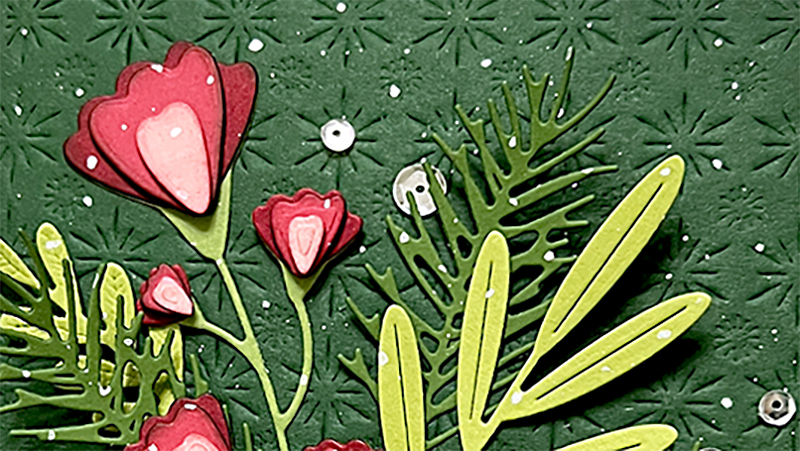
As I started glueing my elements to the card panel, I decided that I wanted the stems to hang out further past my bow. The stems are a bit shorter than what you see on my card. I used one of the larger flowers from the Whimsey Blooms set and cut some extra long stems. I hid the beginning of these longer stems underneath the center of the bow so that the stems would just look continuous. I hope I achieved the look I was going for! After glueing all of the die cuts to the panel, I splattered it with white Distress Paint.
To finish the card, I stamped the sentiment from the Christmas Sentiments Stamp Set. I used VersaMark ink and then heat embossed with an older light green embossing powder that has been in my stash longer than I’d like to admit! I cut the sentiment with the matching die and adhered it to the panel with foam tape. To finish the card, I added some clear, sparkling sequins around the design.
Are you ready to hop along and see inspiration from all of the other designers?
I really enjoyed making these cards and am looking forward to sharing more of my cards from this release! Thank you so much for visiting my blog today. Be sure to hop along and leave some love for all of the talented designers sharing inspiration today!
Wishing you all a crafty day,
Allison
SUPPLY LIST
Note: External links on my blog may contain affiliate links. This gives me the opportunity to earn a small commission when you click on the links and place an order. This comes at no additional cost to you. Thank you so much for your support! You can see more information on my Affiliate Disclosure page.


Very cool card and I’m loving the dark green background
Gorgeous cards!
Awesome cards! I love all of the extra details with the sequins and enamel dots! Bright colors and the shape of those flowers! wow!!
Gorgeous cards
Wow!!!! Really Beautiful cards!!!
I am in love with your cards!
Love your cards and that die set.
Oh my gosh! The first card is amazing. And then I scrolled down…and the GREEN card is incredible. I LOVE THIS SO MUCH.
Both are stunning! I LOVE the green and the gorgeous flowers!
Fabulous cards! Love them both.
Gorgeous cards!
Wow! Gorgeous designs! I love the colors and texture on both!
WOW! A duo of gorgeous cards that showcase the new products wonderfully. I’m loving everything in this new release!
Carol
Fabulous cards! Love these awesome designs you used and the color combos! Love the whimsy bloom bouquet dies, and your Christmas card is gorgeous with such lovely details!
Beautiful 💜
Wonderful color combinations!