Hello, friends! I hope this finds all of you doing well. I am trying to switch gears in my craft room and get things ready to go out the door. This is the part of card making where my procrastination creeps in. I think I mentioned that in my last post, and guess what?! I haven’t gotten anything else out the door yet. Tomorrow! Right? Right. Maybe. I mean, who doesn’t like getting a Christmas card in January?
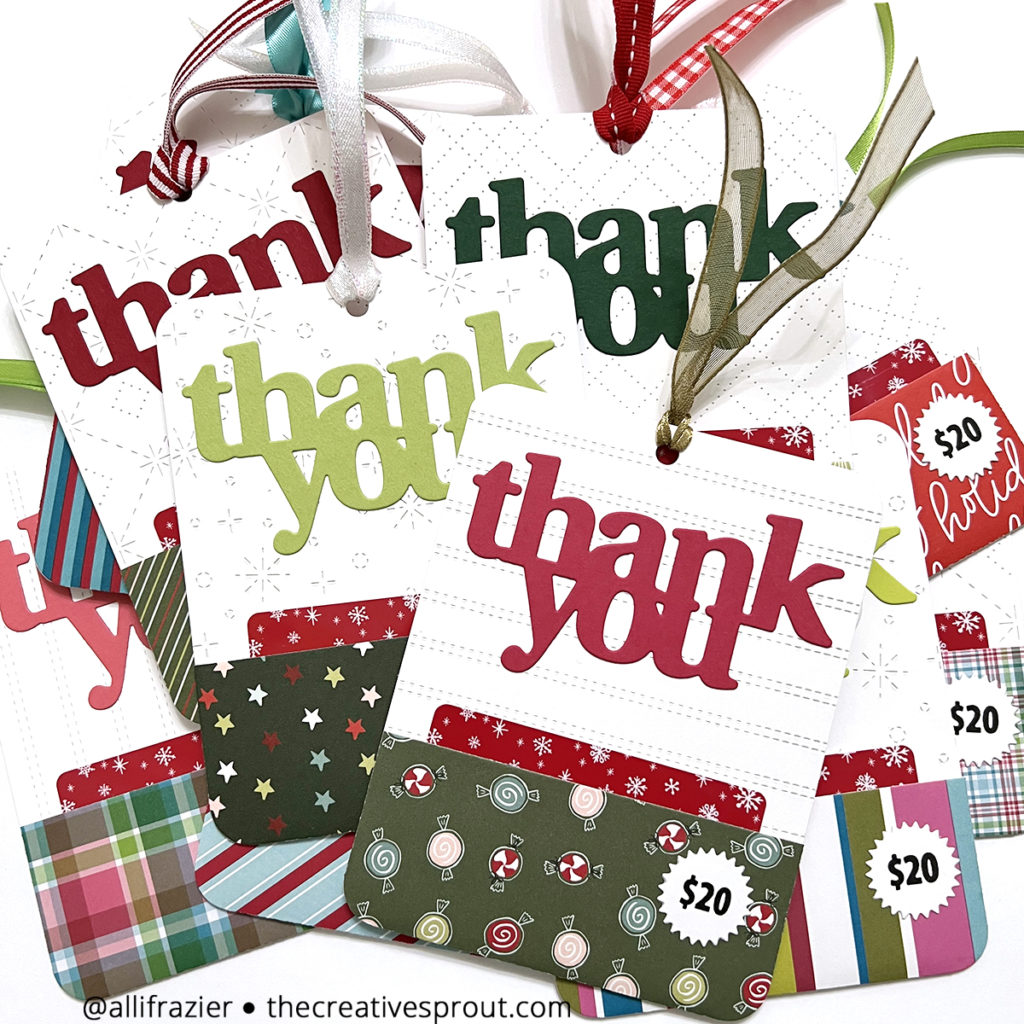
What I can promise that I’m getting out tomorrow are all of the teacher gift cards. Between my two sons, we have 14 teachers to give gifts/cards to. As soon as I saw the November Christmas Cash Kit from My Favorite Things, I instantly knew that it would be the perfect fit for this occasion. Just an FYI – this kit sold out pretty fast. But what I love about MFT is that they sell all of the components of their kits separately and concurrently with the release of their kits. While my teacher “tags” hold gift cards, I also made some tags which hold cash, so make sure to scroll down for details on those. And while the kit that I purchased focuses on Christmas, MFT has a bunch of fun add-ons for these products. There are stamps (and dies) for birthdays, for coffee lovers, etc. So, these products really can be used year-round.
Gift Card Holder Supplies
My Favorite Things – Money Card Die-namics
My Favorite Things – Gift Card Pocket Die-namics
My Favorite Things – Price Tag Stamp Set
My Favorite Things – Christmas Cash Stamp Set
My Favorite Things – Feelin’ Festive Paper Pad
My Favorite Things – Cheerful Plaid Paper Pad
My Favorite Things – Hand-Lettered Holiday Greetings Stamp Set (Retired)
Concord & 9th – Snowfall Card Front Die
Concord & 9th – Double Stripe Card Front Die
Concord & 9th – Be Merry Patterned Paper Pack
Pinkfresh Studio – Sparkling Diamonds Cover Die
The Stamp Market – Pierced Plaid Cover Die
Waffle Flower – Christmas Stripes Paper Pad
Waffle Flower – Oversized Thank You – Print Die
Making the Gift Card Holders
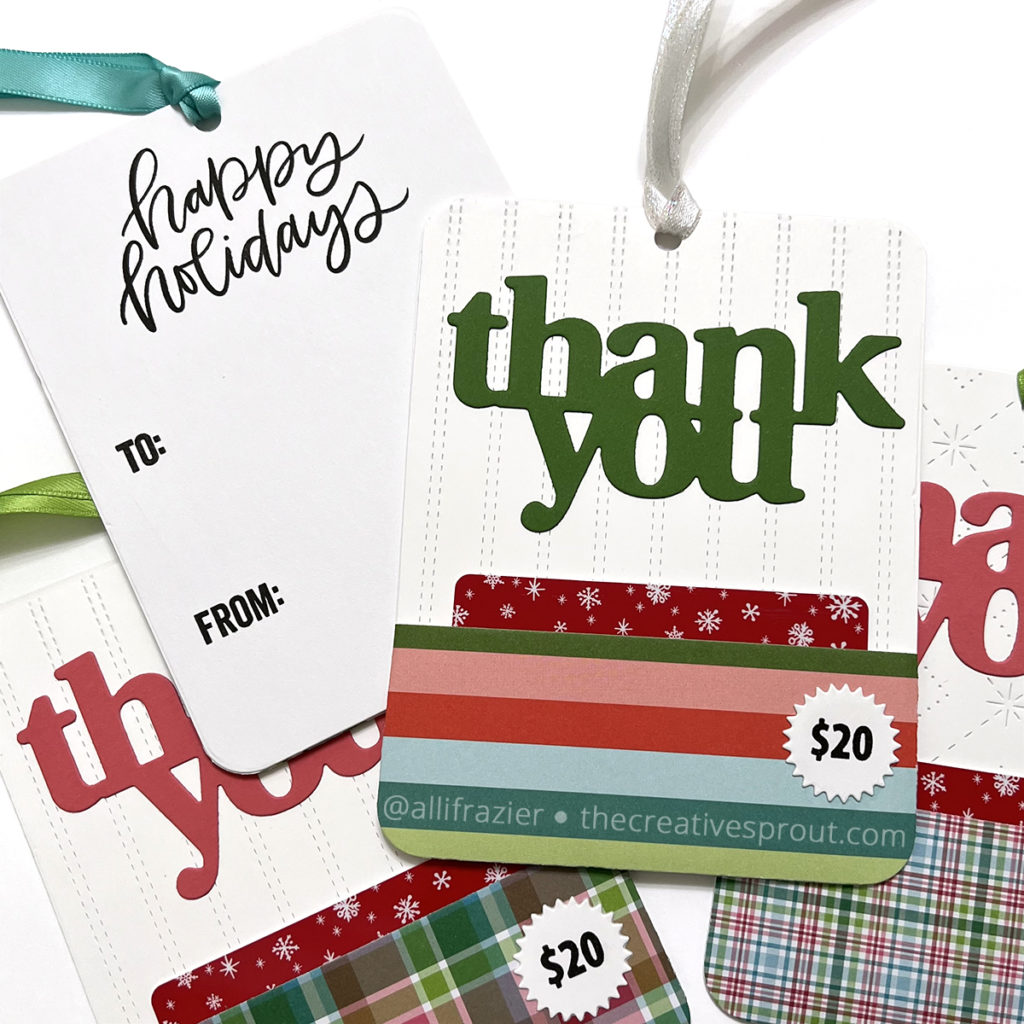
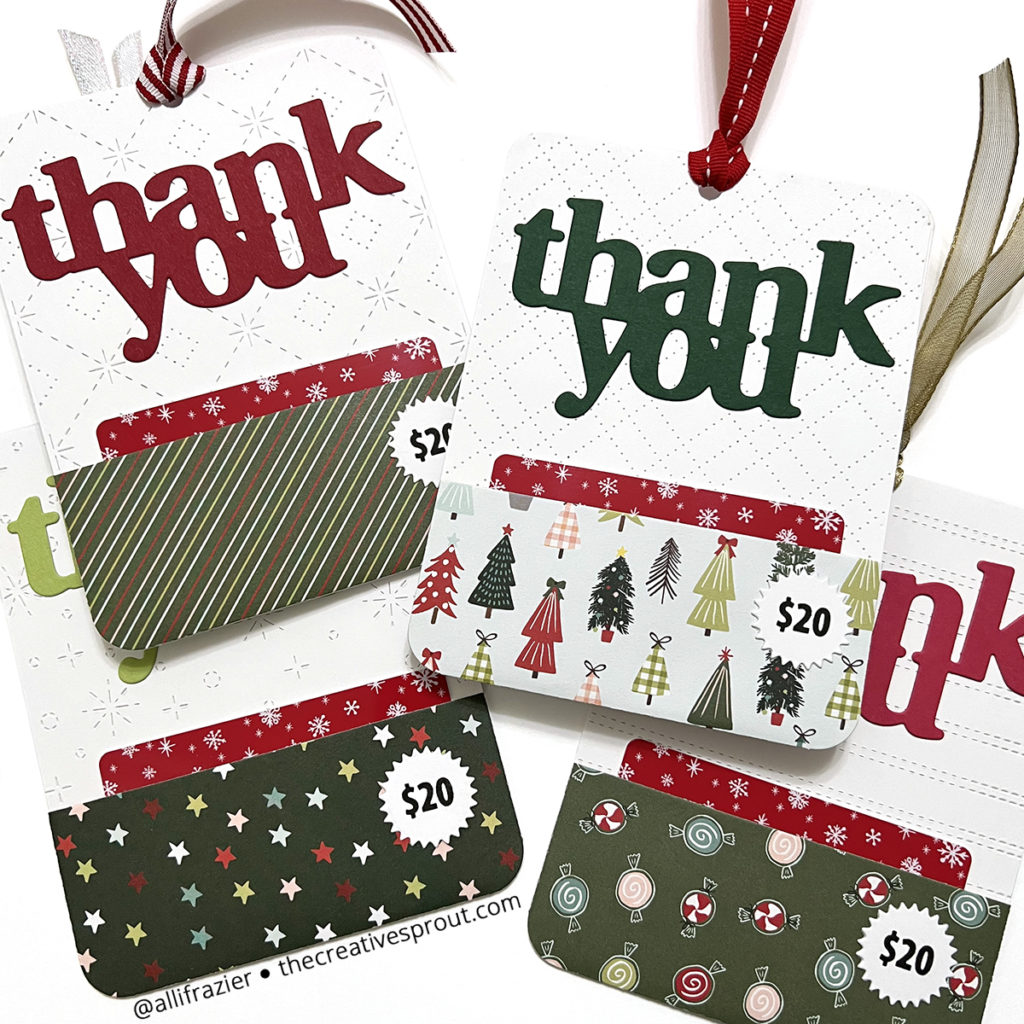
The first thing I want to point out about my gift card holders is that they are not cards. They are a double-sided “tag.” Although, they are large, as they are the size of an A2 card. You could easily make a shaped card by just taking the rounded rectangle die from the main set and partial die-cut an A2 top-folding card base. Like I said, mine are double-sided, so I began by cutting two of the bases for each tag out of white card stock. I wanted to add texture to the front of the tags since I knew they were going to be pretty simple, so I ran the front pieces back through my die-cutting machine with a variety of cover dies that make stitched designs. You can see the four different dies that I used in the picture below – Snowfall Card Front, Pierced Plaid, Sparkling Diamonds, and Double Stripe.
For the back pieces of the tags, I stamped the same thing on all of them so that I could do it assembly line fashion in my MISTI. I used the “to” and “from” from the Christmas Cash Stamp Set, and the “Happy Holidays” from the retired Hand-lettered Holiday Greetings set from MFT. Yes, it’s retired, but it’s such a classic set that I still make use of it a lot at the holidays. Once the backs were stamped, I glued the front and back pieces together. The fun part was picking out patterned paper for the gift card pockets. What a great way to use up some of those scraps of patterned paper! I used some of my favorite Christmas papers, and of course it’s always times like these when I discover that some of them have been retired. Like the Cool Collab paper pack from MFT. Boo. You may also notice my favorite patterned paper in the picture above – this is the Baking Spirits Bright pad from Simple Stories that I’ve probably already mentioned a million times. And guess what? No longer available. What???!! The 12×12 pack and other pieces of this collection are still available.
After adhering the gift card pockets to the bottom of the tags, I die-cut the “thank you” out of complementary colors of card stock and adhered them to the tags. I only did one layer for these dies because…lazy. I’m not afraid to admit it. I could have cut the shadow die out, as well. But again…lazy. Did I mention there are 14 teachers and even more people who may never get holiday cards from me this year?? Dimension will have to wait. To finish the tags, I cut a bunch of the little round price tags with the die from the main die set, and then I stamped the $20 on them, again using the assembly line method in the MISTI. At the last minute, I decided to add some ribbon. Because I am not lazy. Ha!
Cash Holder Supplies
My Favorite Things – Money Card Die-namics
My Favorite Things – Lip Balm Pouches
My Favorite Things – Christmas Complements Die-namics
My Favorite Things – Price Tag Stamp Set
My Favorite Things – Christmas Cash Stamp Set
My Favorite Things – Cheerful Plaid Paper Pad
La-La Land Crafts – Long Flags Die Set
Spellbinders – Swallowtail Tags Die Set
The Stamp Market – Mini Skinny Upper Alpha Die Set
Doodlebug – Great Outdoors 6×6 Paper Pad
Taylored Expressions – Simple Strips – Hanukkah
Making the Cash Holders
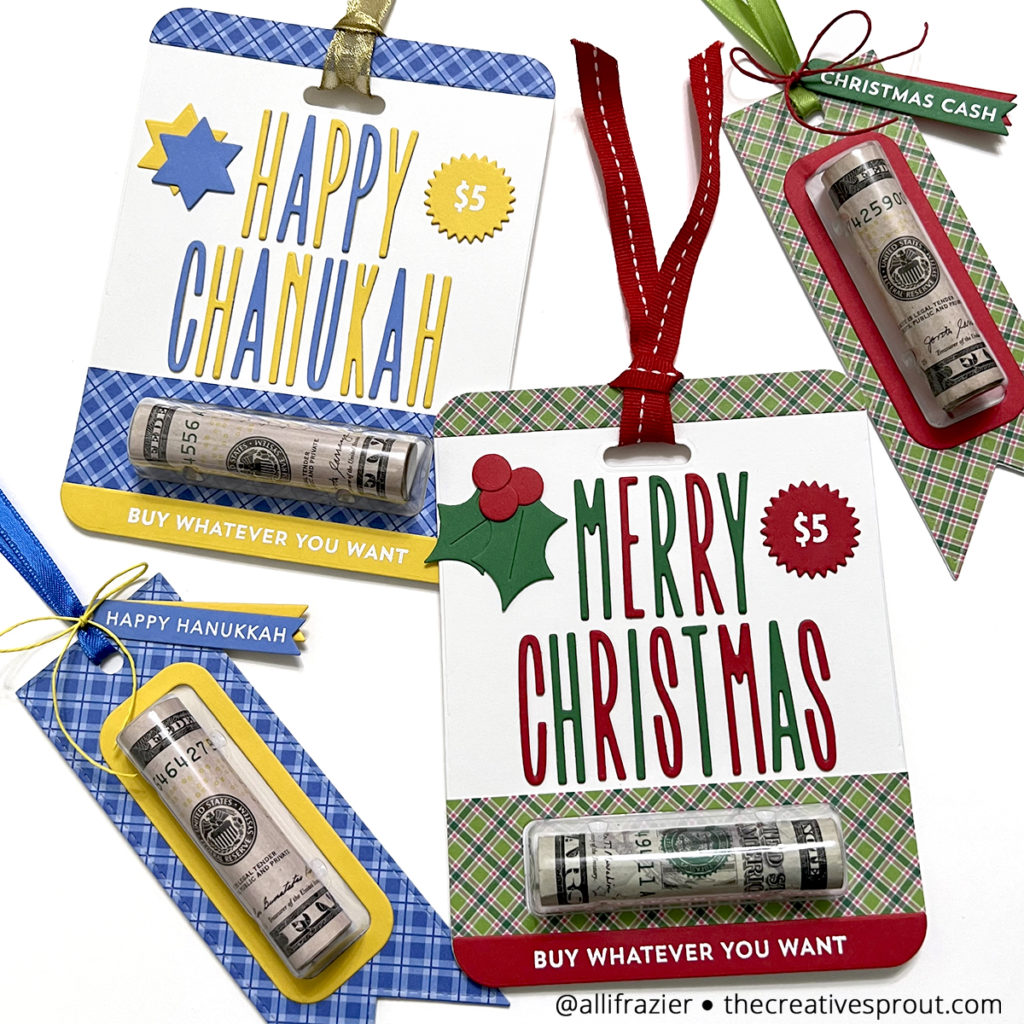
Last week, I had a blog post featuring some “same, but different” cards for Chanukah and Christmas. So, of course I had to do that with this new set of MFT products! Plus, I wanted to try out the new cash slot feature using the Lip Balm Pouches. I started the same way as I did with the teacher tags – making a front and back panel using the large rounded rectangle die from the main set. I also partial die cut a piece of plaid paper and attached that to the bottom of the front panel. After that, I could die cut the opening for the Lip Balm Pouch. I continued to decorate the front of the tag. I used the small border die for the top and bottom of my tags, stamping a sentiment on the bottom border. I used the Mini Skinny Upper Alpha Die Set for my main greetings. This die set is really awesome when you need to create long sentiments in a small area! I used holly leaves and berries for the Christmas card and Stars of David for the Chanukah card (that star die comes from an old Paper Smooches set).
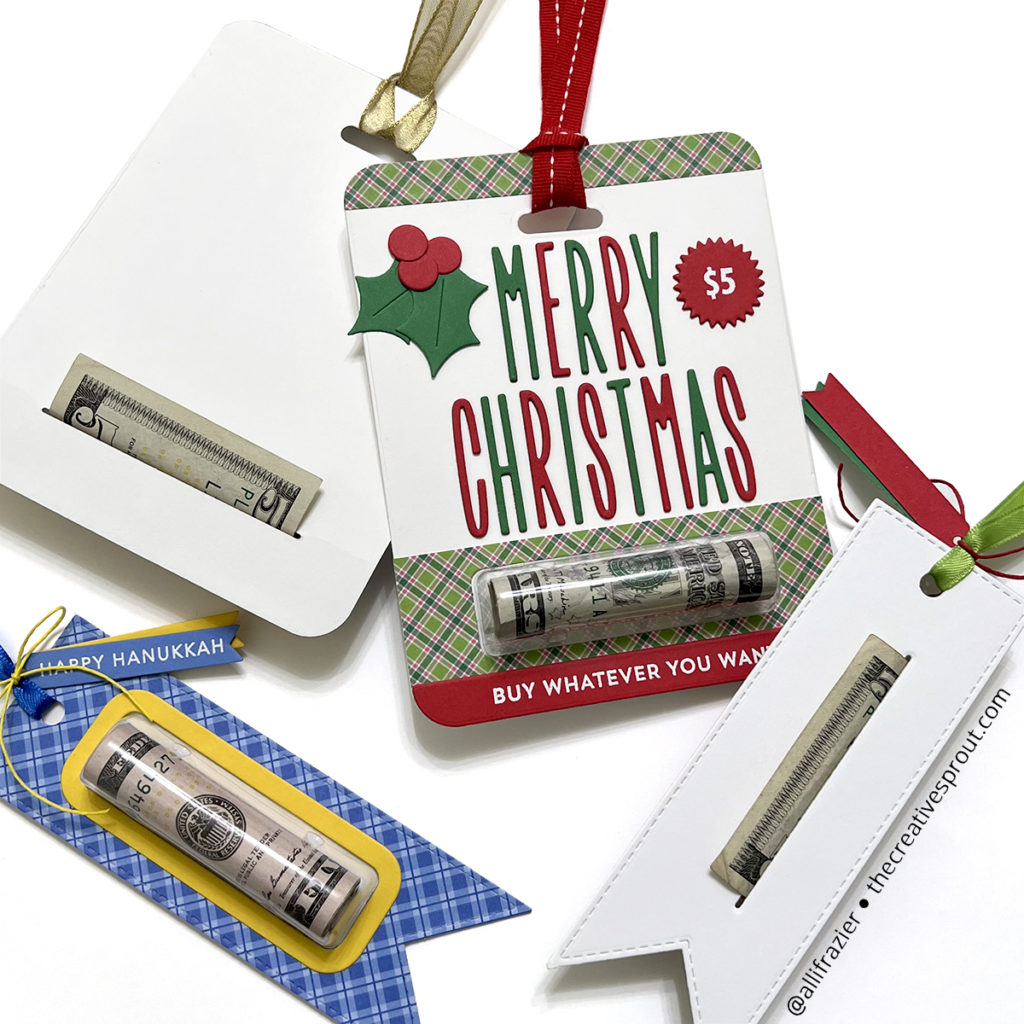
To create the “cash tag,” you first insert and attach the Lip Balm Pouch to the front piece. I use Scor-tape for this. Next, you line up the front and back pieces of the tag to figure out where to die-cut the slot (from the main die set) on the back piece. Once that slot is cut, you roll up your money, feed a short part through the back of the back piece, and then attach the front and back together. How you do this while still keeping the money rolled up is a bit awkward at first. But you eventually figure out what’s easiest for you. I’ve seen several people do it in videos, and even they didn’t do it the same way!
I loved the money roll so much that I had to do it again, but on a smaller scale. So, I used the largest die from the Long Flags die set to create a small tag. Attaching everything together was basically the same methodology. For these tags, I stamped some little sentiments that I cut out with the Swallowtail Tags die set and then attached to the tag ribbons with some string.
I know the boys’ teachers are going to love receiving their gift card tags! And in case you were curious, the gift cards are for The Container Store. We are lucky to have one about 10 minutes away from the school, and everyone loves to be organized (not just us crafters)! I hope all of these tags and patterned paper extravaganza put a smile on your face. I’m already thinking of the next occasion I can use these dies for. But on a much smaller scale – ha ha. Thank you so much for stopping by today. And wish me luck getting some cards in the mail tomorrow. Or maybe the next day.
Wishing you all a crafty day,
Allison
Note: External links on my blog may contain affiliate links. This gives me the opportunity to earn a small commission when you click on the links and place an order. This comes at no additional cost to you. Thank you so much for your support, as this helps me bring you more content.
